Valentine Cookie Decorating: Ultimate Guide

1. Introduction to Valentine Cookie Decorating
Valentine cookie decorating is a truly unique art form, perfect for expressing love and affection during the Valentine’s season. In this guide, I’ll explore why this delightful activity is enjoyable for everyone, whether it’s couples looking to share a sweet experience, friends gathering for a fun crafting session, or individual enthusiasts who revel in baking and decorating on their own.
Why Decorate Cookies for Valentine’s Day?
Valentine’s Day is all about expressing love, and what better way to show care and creativity than through beautifully decorated cookies? They’re not only delicious treats but also personalized gifts that can convey heartfelt messages.
What Makes Cookie Decorating Special?
Cookie decorating allows for an endless array of designs tailored to personal tastes. Whether it’s intricate patterns or simple, sweet messages, each cookie becomes a canvas for your emotions and artistry.
2. Essential Tools for Valentine Cookie Decorating
When embarking on your valentine cookie decorating journey, having the right set of tools can make all the difference in transforming simple baked goods into stunning, heartfelt creations. Let’s delve into the essential tools you need, categorizing them into baking supplies and decorative tools. This guide will help you choose high-quality tools that enhance your cookie decorating process, making it both fun and efficient.
Choosing the Right Baking Supplies
Successful valentine cookie decorating starts with perfectly baked cookies. Here are some indispensable baking tools that will help ensure your cookies are baked to perfection:
- High-Quality Baking Sheets: Look for heavy-duty, flat baking sheets that provide consistent heat distribution. This helps avoid hot spots that can cause uneven baking.
- Silicone Baking Mats: These mats provide a non-stick surface, ensuring your cookies slide off easily without breaking. They also help distribute heat evenly, which is crucial for uniform baking.
- Durable Rolling Pins: A good rolling pin should feel comfortable in your hands and offer smooth action. Opt for non-stick rolling pins or consider using rolling pin rings, which help you roll your dough to an even thickness.
- Cookie Cutters: Choose a variety of shapes relevant to Valentine’s Day, such as hearts or letters for personalized messages. Metal cutters tend to hold their shape better than plastic ones.
Decorative Tools You Can’t Do Without
Once your cookies are baked, the real fun begins with decorating. Here are some essential decorative tools that will help you apply your artistic visions to these sweet canvases:
- Piping Bags: Disposable piping bags are great for easy cleanup, but reusable silicone bags are also an eco-friendly option. They are crucial for precise icing application.
- Variety of Icing Tips: Different icing tips can create various effects and textures. Some key types include:
- Round Tips: Perfect for writing and adding precise details.
- Star Tips: Great for textured designs and borders.
- Leaf Tips: Ideal for adding decorative leaf shapes.
- Offset Spatula: This tool is essential for spreading icing evenly over larger areas or for smoothing the base layer of icing before adding more intricate decorations.
- Food Coloring: Gel food coloring is preferable as it provides vibrant colors without thinning the icing. Select a variety of colors to mix and match for your Valentine’s themes.
Additional Helpful Accessories
To elevate your valentine cookie decorating further, consider these additional tools:
- Tweezers: Useful for placing small decorations like sprinkles or edible pearls with precision.
- Scribe Tool or Toothpicks: These are perfect for adjusting the flow of icing and correcting any small mistakes.
- Stencils: For those who prefer guided designs, stencils can be a great help in achieving consistent motifs or patterns.
3. Preparing Your Cookie Dough for Valentine Cookie Decorating
The foundation of any great cookie decorating project is the cookie dough itself. For Valentine’s Day, crafting a dough that not only tastes delightful but also holds its shape during baking is essential for creating that perfect canvas for your decorative touches. Below, we’ll dive into a reliable cookie dough recipe and offer tips to ensure your dough is ready for those intricate valentine cookie decorating ideas.
The Perfect Cookie Dough Recipe
Crafting the perfect dough for Valentine’s Day requires precision and the right balance of ingredients to ensure the cookies maintain their shape and offer a tender, delicious bite. Here’s a simple yet effective recipe that meets these criteria:
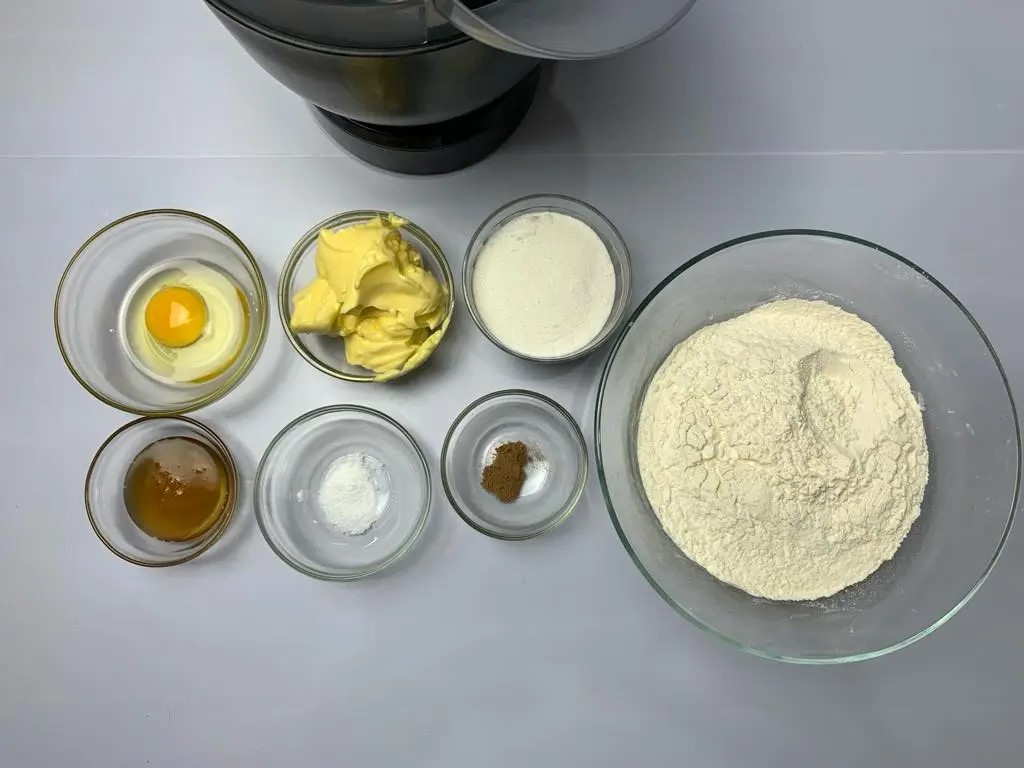
- Ingredients:
- 3 cups all-purpose flour
- 1 teaspoon baking powder
- 1/2 teaspoon salt
- 1 cup unsalted butter, softened
- 1 cup sugar
- 1 egg
- 2 teaspoons vanilla extract
- Preparation Steps:
- Combine Dry Ingredients: In a medium bowl, whisk together the flour, baking powder, and salt.
- Cream Butter and Sugar: In a large bowl, use an electric mixer to cream the softened butter and sugar until the mixture is light and fluffy.
- Add Egg and Vanilla: Beat in the egg and vanilla extract until fully incorporated.
- Gradually Mix in Dry Ingredients: Slowly add the dry ingredients to the wet mixture, blending until the dough comes together without overmixing.
- Chill the Dough: Wrap the dough in plastic wrap and refrigerate for at least one hour. This step is crucial as it helps the dough firm up and makes it easier to roll and cut without sticking.
Tips for Rolling and Cutting Your Dough
Once your dough is chilled, it’s time to roll it out and shape it into cookies. Here are some tips to help you get the best results:
- Thickness Matters: Roll your dough to about 1/4 inch thick. This thickness is ideal for ensuring that the cookies bake evenly without puffing up too much or becoming too crisp.
- Keep it Cool: If the dough starts to warm up and becomes sticky while you’re working with it, don’t hesitate to pop it back in the refrigerator for a few minutes. Working with cool dough will help you achieve cleaner cuts and more defined shapes.
- Use Creative Cutters: Valentine’s Day is all about personal touches and creativity. Use heart-shaped cutters, or even custom-designed cutters that can reflect personal interests or messages. These themed shapes will add an extra layer of meaning to your cookie decorating efforts.
- Dusting Flour: To prevent sticking, lightly dust your rolling pin and work surface with flour. However, use it sparingly to avoid making the dough too dry.
4. Baking the Perfect Cookie
Achieving the perfect bake for your cookies is crucial, especially when they serve as the canvas for intricate Valentine’s Day decorations. Baking cookies that are uniform in size and color, while maintaining a soft but stable texture, is both a science and an art. Here, we’ll explore essential baking tips and how to avoid common mistakes to ensure your cookies are ideally prepared for decorating.
Key Baking Tips
To guarantee that your cookies turn out just right and are suitable for detailed valentine cookie decorating, follow these expert tips:
- Even Spacing on Baking Sheets: Arrange your cookies at least one inch apart on the baking sheet. This spacing allows hot air to circulate evenly around each cookie, promoting uniform baking and preventing the edges from merging together.
- Bake Until Golden: Monitor your cookies and remove them from the oven when the edges just start to turn a golden brown. The center should remain soft but stable, creating an ideal surface for decorating. Typically, this takes about 8-10 minutes in an oven preheated to 350°F (175°C), but keep an eye on them as oven temperatures can vary.
- Consistent Oven Temperature: Ensure your oven is properly calibrated. An oven thermometer can help verify that the temperature is accurate for optimal baking results.
Common Baking Mistakes to Avoid
Even experienced bakers can run into issues. Here are some common baking mistakes and how to sidestep them:
- Overbaking: One of the most common errors is leaving cookies in the oven for too long. Overbaked cookies become dry and brittle, making them prone to breaking when you try to apply icing or decorations. Set a timer, and don’t stray far from the kitchen.
- Uneven Thickness: When rolling out your cookie dough, strive for uniform thickness. Uneven dough results in uneven baking, where thinner parts might burn while thicker parts remain undercooked. Use rolling pin guides or even dowels on either side of your dough to achieve even thickness.
- Ignoring Dough Temperature: If the dough warms up too much during handling, it can spread too much during baking. Keep your dough chilled until you’re ready to bake, and if it becomes too soft, refrigerate it for 10-15 minutes to firm it up.
- Placement in the Oven: Avoid placing your baking sheet too close to the top or bottom of the oven, as this can cause uneven baking. Center the baking sheet within the oven for the best heat distribution.
Additional Tips for Perfection
- Use Parchment Paper: Lining your baking sheets with parchment paper can prevent sticking and ensure easy removal without damaging the cookies’ surfaces.
- Do Not Overcrowd the Oven: Bake in batches if necessary to avoid overcrowding, which can lead to uneven baking and heat distribution issues.
5. Icing and Decoration Techniques for Valentine Cookie Decorating
Decorating cookies is where your creativity can shine, especially for Valentine’s Day. This section of our guide will introduce you to the basics of working with royal icing, the most popular choice for cookie decorators due to its versatility and fine finish. We’ll cover how to mix your icing to the perfect consistency, and delve into techniques for adding color and texture that can turn a simple cookie into a stunning gift.
Royal Icing 101
Royal icing is favored in valentine cookie decorating for its ability to dry smooth and firm, making it ideal for stacking, transporting, or gifting cookies without damaging the artwork. Here’s how you can prepare royal icing:
- Ingredients:
- 4 cups powdered sugar
- 2 tablespoons meringue powder
- 5 tablespoons water
- Food coloring (optional)
- Preparation:
- Step 1: Combine powdered sugar and meringue powder in the bowl of your stand mixer.
- Step 2: Add water and begin mixing at low speed. Gradually increase the speed to medium-high.
- Step 3: Continue to beat the mixture for approximately 7-10 minutes or until the icing forms stiff peaks. This texture is crucial for it to hold its shape once piped onto cookies.
Creating Different Icing Textures
The consistency of your icing can greatly affect the outcome of your decorations. Adjusting the amount of water slightly can give you a variety of textures suited for different decorating techniques:
- Flood Consistency: For covering large areas with a smooth layer of icing, you’ll want flood consistency. Add a bit more water to your stiff icing until it flows easily off a spoon but still holds a line when piped.
- Medium Consistency: Ideal for outlining and adding details that require more precision. This icing should be soft enough to pipe easily but stiff enough to hold its shape.
- Stiff Consistency: Used for very detailed work such as piping flowers or upright decorations. This consistency is achieved with less water, making the icing firm.
Color Mixing for Valentine’s Themes
Choosing the right colors is essential for thematic cookie decorating, especially for Valentine’s Day. Here are tips on selecting and mixing colors:
- Choose Your Palette: Typical Valentine’s colors include various shades of red, pink, and white. These can be combined or used singly to convey different moods and themes.
- Mixing Colors: Start with a base color and add drops of food coloring to achieve the desired shade. Remember, colors can deepen as the icing dries, so it might be wise to go slightly lighter when mixing.
- Testing Colors: Before applying to your cookies, test a small amount of colored icing on parchment paper to see how it dries and adjusts as needed.
Tips for Applying Icing
- Use Piping Bags: Fit a piping bag with your chosen tip, fill it with icing, and practice a few lines on parchment paper before starting on your cookies.
- Outline First: Always start by outlining your cookie’s edges with medium consistency icing. This creates a barrier to prevent flood icing from spilling over.
- Flood Fill: Once the outlines are set, fill them in with flood consistency icing. Use a toothpick or scribe tool to spread the icing evenly and pop any air bubbles.
- Layering: Allow each layer of icing to dry before adding new details on top to prevent colors from bleeding into each other.
6. Advanced Decorating Ideas
As you grow more confident in your basic valentine cookie decorating skills, exploring advanced techniques can add a professional touch and personal flair to your creations. This section covers how to utilize stencils for achieving detailed patterns and incorporating edible decorations to elevate the aesthetic appeal of your cookies. These advanced methods are perfect for those looking to impress with their intricate and unique designs.
Using Stencils for Perfect Patterns
Stencils are an excellent tool for achieving detailed and consistent designs on your cookies, especially if you’re aiming for precision without the need for freehand drawing. Here’s how you can incorporate stencils into your valentine cookie decorating:
- Choosing Stencils: You can find a wide variety of cookie stencils online or in craft stores. Look for designs that suit the Valentine’s theme, such as hearts, love letters, or floral patterns. Alternatively, you can create your own stencils using thin plastic sheets or parchment paper, which allows for completely customized designs.
- How to Use Stencils:
- Position the Stencil: Lay the stencil flat over the fully cooled cookie.
- Apply the Icing: Use a small offset spatula to gently spread a thin layer of stiff consistency royal icing over the stencil. Ensure the icing is even and covers all open areas of the stencil.
- Remove the Stencil: Carefully lift the stencil straight up off the cookie to reveal the design. Allow the icing to set completely before further handling.
- Tips for Success:
- Ensure the base layer of icing on the cookie is completely dry before applying a stenciled design.
- Clean the stencil between uses to maintain sharp lines and prevent color mixing.
Edible Decorations to Enhance Your Cookies
Adding edible decorations is another way to make your Valentine’s Day cookies stand out. These can include anything from simple sprinkles to elaborate sugar art, providing not just color but also texture and dimension.
- Types of Edible Decorations:
- Sprinkles and Edible Pearls: These are great for adding a bit of sparkle and texture. Use colors that match your Valentine’s palette for a cohesive look.
- Edible Glitter or Gold Leaf: These can give your cookies a luxurious finish, perfect for a glamorous Valentine’s gift.
- Tiny Fondant Shapes or Marzipan Cutouts: Create small shapes like hearts, flowers, or letters to personalize your cookies further. These can be painted with edible food colors to enhance their appearance.
- Application Tips:
- Apply these decorations while the icing is still wet to ensure they stick.
- For heavier decorations like fondant pieces, you may need to add a dab of icing to the back of the decoration to help it adhere to a dried icing surface.
7. Themed Decoration Ideas for Valentine Cookie Decorating

Valentine’s Day is a wonderful opportunity to express love and affection through creative endeavors like cookie decorating. Here, we’ll explore various themed decoration ideas that cater not only to romantic couples but also to friends and family, enhancing the universal appeal of Valentine cookie decorating.
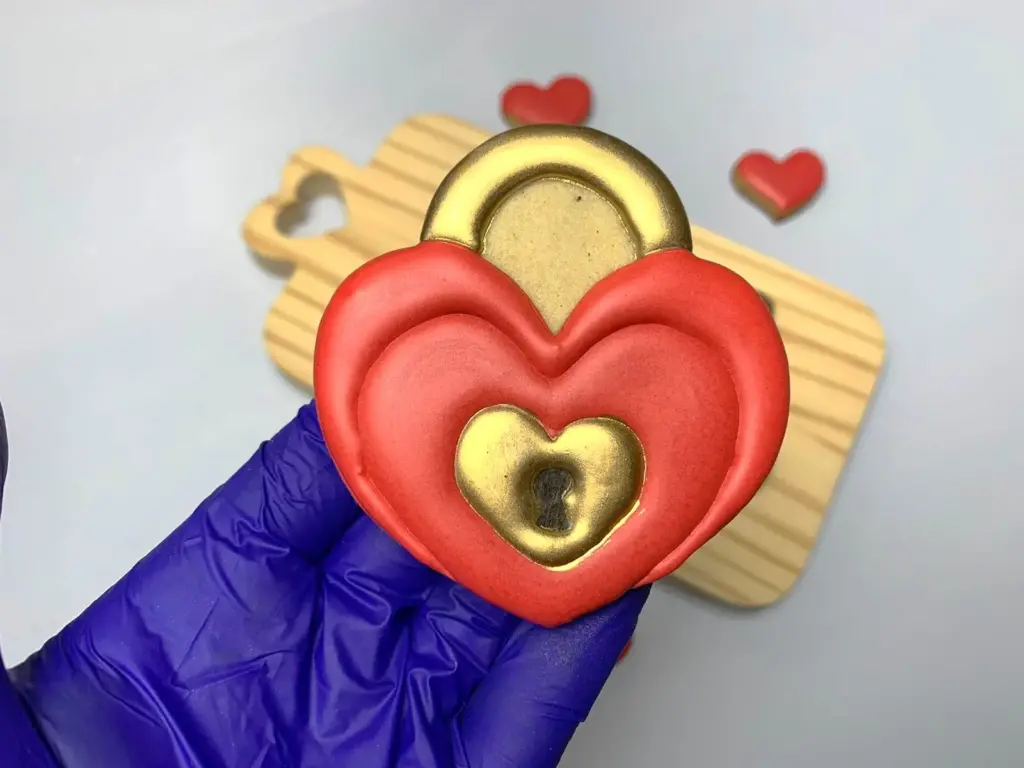
Romantic Designs for Couples
Creating cookies that symbolize love and companionship can add a personal touch to your Valentine’s celebration. Here are some ideas to inspire your designs:
- Symbols of Love: Use cookie cutters in shapes like hearts, Cupid’s arrows, and roses to echo the theme of romance.
- Personalization: Add a personal touch by including the couple’s initials or significant dates like anniversaries. This can be done with precision piping techniques or edible markers.
- Love Letters: Decorate cookies to look like miniature love letters or envelopes sealed with a heart. These can carry messages of love or affection, written in icing.
Fun and Playful Designs for Friends
Valentine’s Day can also be an occasion to celebrate friendships. Here are some playful and lighthearted design ideas:
- Emojis and Social Icons: Decorate cookies with popular emoji faces or symbols that capture the spirit of friendship, such as the classic smiley faces or the “best friends” heart.
- Conversation Hearts: Create cookie versions of the traditional conversation heart candies. Use pastel icing colors and inscribe them with modern or personalized phrases like “BFF” or “Gal Pals.”
- Fun Quotes and Sayings: Incorporate fun and quirky quotes that resonate with your group of friends. Phrases like “Soul Sister” or “Palentine” can add a unique twist to your cookies.
8. DIY Cookie Decoration Kits
For those who love crafting and creativity, assembling your own Valentine cookie decorating kits can be a rewarding project that makes a thoughtful and engaging gift.
How to Make Your Own Kits
Creating a DIY cookie decoration kit involves gathering all the essentials someone would need to decorate cookies at home. Here’s a guide to assembling your kit:
- Components of the Kit:
- Pre-baked Cookies: Include a variety of cookie shapes based on your theme, such as hearts or letters.
- Royal Icing: Offer several colors of royal icing, pre-made and divided into small piping bags.
- Sprinkles and Edible Decorations: Add a selection of sprinkles, edible glitter, and other small decorations to embellish the cookies.
- Decorating Tools: Include a small spatula, toothpicks for fine adjustments, and possibly a few stencils for more intricate designs.
- Packaging: Place these items in a decorative box or basket.
Ideas for Including in Your Kits
While Valentine’s Day is a great occasion for these kits, they can easily be adapted for other events:
- Other Occasions: Think about including themes for birthdays, Easter, Halloween, or Christmas. Each kit can be customized with specific shapes and colors suitable for the occasion.
- All-year Round Gifts: Offer kits as creative gifts for children’s parties, family gatherings, or even as a unique wedding favor.
9. Hosting a Cookie Decorating Party for Valentine’s Day
Organizing a Valentine cookie decorating party can be an exciting and enjoyable way to celebrate with friends and family. It combines creativity, sweets, and socializing into one delightful event. Here’s a detailed guide to planning and hosting a successful cookie decorating party, complete with engaging games and activities that will make your gathering unforgettable.
Planning Your Party
To ensure your Valentine cookie decorating party is a hit, careful planning is essential. Here’s how you can set the stage for a fun and festive event:
- Themed Invitations: Start by sending out creative invitations that match the Valentine’s theme. Consider using card designs with hearts, cookies, or fun phrases that hint at the decorating activities to come.
- Decor and Setup:
- Decorations: Decorate your space with Valentine’s motifs—think red and pink balloons, heart garlands, and romantic lighting.
- Decorating Stations: Set up a large table with ample space for guests to work on their cookies. Cover the table with a disposable tablecloth for easy cleanup.
- Tools and Ingredients: Provide all the necessary decorating tools like piping bags, a variety of icing tips, spatulas, and plenty of royal icing and sprinkles. Don’t forget to include small bowls, utensils for mixing colors, and lots of napkins.
- Sample Cookies: Display a few examples of decorated cookies as inspiration. These can also serve as a conversation starter and spark creativity among your guests.
Party Games and Activities
Adding games and activities to your cookie decorating party not only enhances the fun but also keeps the energy lively and engaging. Here are some ideas to incorporate:
- Cookie Decorating Contest: Challenge your guests to create the best-decorated cookie. Set different categories like “Most Romantic,” “Most Creative,” or “Best Use of Color” to give everyone a fair chance to win. Offer small prizes to make the competition even more exciting.
- Blindfolded Decorating Challenge: This game is both hilarious and challenging. Blindfold participants and have them decorate a cookie. The results are often amusing and make for great photo opportunities.
- Guess the Ingredient: Have a little fun by setting up a taste test station where guests can try to identify ingredients used in different cookie batches.
- Cookie Swap: Encourage guests to bring a batch of their homemade cookies. Everyone can share and exchange different varieties, which adds to the diversity of flavors and decorating styles.
- Decorate Your Own Apron: As a side activity, provide plain aprons and fabric markers or paints. Guests can decorate their aprons at the beginning of the party, which they can wear while working on their cookies.
10. Storing and Packaging Decorated Cookies

Proper storage and attractive packaging are crucial for preserving the quality of your cookies and presenting them beautifully as gifts or party favors.
Best Practices for Storing Cookies
- Airtight containers: Keep your cookies in airtight containers to prevent them from going stale.
- Layering: Use parchment paper or wax paper to separate layers of cookies to prevent them from sticking to each other or ruining the icing.
Creative Packaging Ideas
- Decorative boxes: Choose boxes that match the Valentine’s theme with heart patterns or red and pink colors.
- Clear cellophane bags: These allow your beautifully decorated cookies to be seen, tied with a ribbon or a custom tag.
11. Troubleshooting Common Issues
Even seasoned bakers and decorators encounter issues during the cookie decorating process. Understanding how to effectively resolve these challenges can make your valentine cookie decorating experience much smoother and more enjoyable. Below, we delve into some common decorating problems and offer practical solutions to help you maintain high standards in your cookie creations.
Fixing Icing Consistency Problems
The consistency of your icing is crucial for successful cookie decorating. Whether it’s too thick or too thin, improper consistency can lead to frustration and subpar results. Here’s how to adjust your icing to the perfect texture:
- Icing Too Thick: If your icing is overly thick, it can be difficult to work with and may not spread smoothly on your cookies. To remedy this:
- Gradually add a few drops of water and stir well.
- Mix slowly to avoid creating air bubbles until the icing reaches a more fluid consistency.
- Test the icing on a cookie or a piece of parchment to ensure it flows nicely but still holds shape.
- Icing Too Thin: Thin icing can run off the edges of your cookies or not hold detailed designs. If you find your icing too runny:
- Add small amounts of powdered sugar, a tablespoon at a time, mixing thoroughly after each addition.
- Continue adding powdered sugar until the icing thickens to a suitable consistency for piping or spreading.
What to Do If Decorations Don’t Stick
Decorations such as sprinkles, edible pearls, or custom fondant pieces add a festive touch to cookies but can sometimes fail to adhere properly. Here’s how to ensure your decorations stay in place:
- Icing Not Dry: It’s essential to apply decorations while the icing is still wet. This is especially true for lighter decorations like sprinkles or fine glitter.
- Gently press the decorations into the soft icing without disturbing the underlying design.
- If you miss the window while the icing is wet, dab a small spot of fresh icing onto the back of each decoration and attach it to the dry surface.
- Heavier Decorations: For heavier items like large fondant shapes or candies, it’s crucial to secure them properly:
- Apply these decorations immediately after you spread or pipe your icing, while it’s still very tacky.
- For decorations added to dried icing, use a small dab of fresh icing as an “adhesive” to bond the decoration firmly to the cookie.
Additional Tips for Smooth Decorating
- Temperature and Humidity Control: Keep your decorating environment cool and dry, as high humidity can affect icing consistency and drying times.
- Piping Techniques: Practice your piping skills on parchment before applying them on cookies, helping you feel more confident and reduce mistakes.
- Preparation: Always have extra ingredients on hand for quick fixes, whether it’s more icing sugar for thickening or some extra water for thinning.
12. Conclusion
We’ve covered everything from making the perfect dough and icing to advanced decorating techniques and even how to host your own cookie decorating party. Valentine’s Day is the perfect occasion to put these skills to the test, whether you’re making treats for a loved one, friends, or just for fun. Remember, the key to great cookie decorating is creativity and having fun!
13. FAQs
- What is the best icing to use for cookie decorating?
Royal icing is the best choice for its smooth texture and firm drying, making it ideal for intricate designs. - How long do decorated cookies last?
If stored properly in an airtight container, decorated cookies can last up to 2 weeks. - Can I freeze decorated cookies?
Yes, you can freeze decorated cookies. Place them in a single layer on a baking sheet to freeze initially, then transfer to an airtight container, separating layers with parchment paper. - Are there any quick decoration tips for last-minute preparations?
Use store-bought icing pens for quick and easy detailing, or sprinkle edible glitter for a festive touch without much effort. - How can I make vegan-friendly icing?
Substitute meringue powder with aquafaba (the liquid from canned chickpeas) in your royal icing recipe for a vegan-friendly option.
This comprehensive guide should equip you with all the skills and knowledge you need to create stunning and delicious cookies for Valentine’s Day—or any day that calls for a special treat. Enjoy the process, and let your creativity shine!
Resources
- https://minimalistbaker.com/a-guide-to-aquafaba/
- https://thegracefulbaker.com/troubleshooting-royal-icing-common-problems-while-cookie-decorating/


