Decorating Thanksgiving Cookies: The Ultimate Guide

1. Introduction to Decorating Thanksgiving Cookies
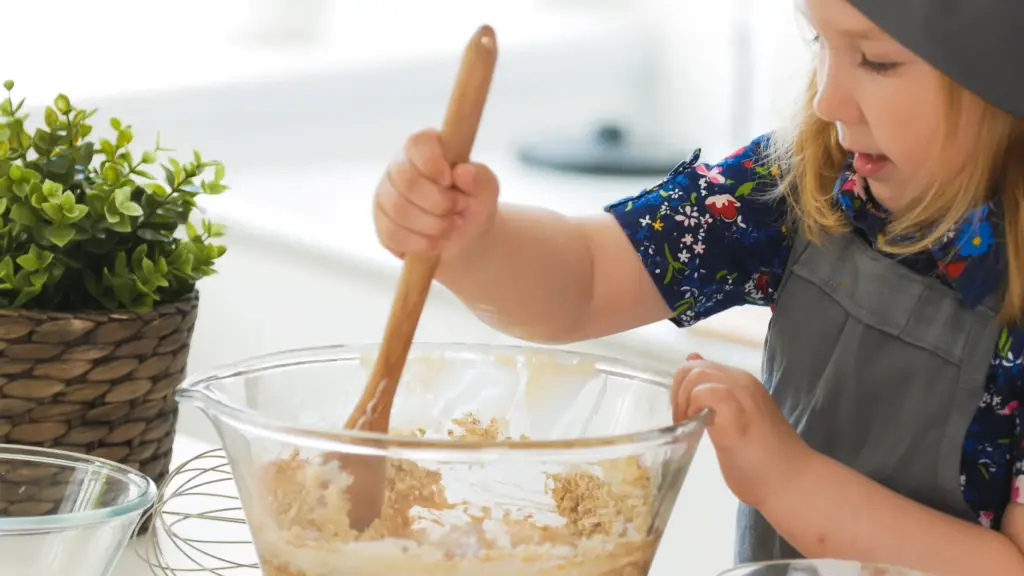
Thanksgiving is not just a time for giving thanks but also a perfect opportunity to unleash your creativity through baking. Decorating cookies for Thanksgiving is an activity that can bring together family and friends, fostering a fun and collaborative environment. In this guide, I’ll walk you through every step of creating stunningly decorated cookies that will impress everyone at your Thanksgiving gathering.
Why Decorate Cookies for Thanksgiving?
Decorating cookies adds a personal touch to the holiday and can be a great way to engage kids in the festivities. It’s a creative outlet that combines art with baking, resulting in delicious and beautiful treats that reflect the spirit of Thanksgiving.
What You Will Learn
By the end of this guide, you’ll know how to:
- Prepare and set up your cookie decorating station.
- Choose and mix the best dough and icing.
- Apply various decorating techniques from basic to advanced.
- Store and preserve your cookies for optimal freshness.
2. Preparing Your Cookie Decorating Station for Thanksgiving
When it comes to decorating Thanksgiving cookies, preparation is key. Setting up a dedicated decorating station with the right tools and a comfortable environment can make the process enjoyable and efficient. Here’s how you can create an optimal setup that streamlines your decorating process, making it a delightful part of your Thanksgiving festivities.
Selecting Your Tools and Ingredients
Before you start decorating, having the right tools and ingredients on hand is essential. Here’s what you’ll need to gather:
Essential Tools:
- Rolling Pins: Essential for evenly flattening your dough to the desired thickness.
- Cookie Cutters: Choose various shapes that reflect the Thanksgiving theme, such as leaves, turkeys, or pumpkins.
- Baking Sheets: Have several on hand to bake large batches or to sort different shapes easily.
- Piping Bags and Tips: These are crucial for applying detailed and intricate icing designs. A variety of tips will allow for different decorative effects.
Key Ingredients:
- Cookie Dough: Whether you make it from scratch or use a premade mix, ensure you have enough to create all your desired shapes.
- Icing: Prepare multiple colors using food coloring to match the Thanksgiving theme. Consider both thicker consistencies for outlining and thinner ones for filling.
- Decorative Accents: Sprinkles, edible glitter, and colored sugars can add a festive touch to your cookies.
Setting Up an Efficient Workspace
Creating an efficient workspace not only helps in keeping the decorating process organized but also enhances your creativity by reducing clutter and stress. Here’s how to set up your station:
Clean and Clear:
- Hygiene: Start with a clean counter or table to ensure food safety.
- Space Management: Clear the area of any non-essential items to maximize your decorating space.
Accessibility:
- Tool Arrangement: Place all your tools within easy reach. Use organizers or trays to keep similar items together, such as piping tips, spatulas, and brushes.
- Ingredient Placement: Keep ingredients organized by type—dough, icings, and decorations should each have their own designated spot.
Comfort:
- Seating: If you prefer sitting while decorating, ensure you have a comfortable stool or chair that keeps you at the right height for your workspace.
- Standing Mats: If standing, consider placing an anti-fatigue mat underfoot to ease pressure on your legs and back.
Lighting:
- Adequate Illumination: Good lighting is crucial. If natural light is insufficient, set up a desk lamp or ensure overhead lighting is adequate to prevent eye strain and help you focus on detailed decorating work.
Additional Tips:
- Temperature Control: Keep the room at a moderate temperature to prevent the dough and icing from becoming too soft or too hard.
- Plan Ahead: Before starting, sketch out a few designs or have a clear idea of what decorations you aim to create. This will streamline the decorating process and reduce the time spent deciding on designs mid-task.
3. Choosing Your Cookie Dough for Decorating Thanksgiving Cookies
When preparing for decorating Thanksgiving cookies, selecting the right cookie dough is crucial. The dough not only serves as the canvas for your decorations but also contributes significantly to the taste and overall success of your cookies. Below, we’ll explore some of the best dough recipes for Thanksgiving and offer tips on how to make your cookies stand out with unique flavors and textures.
Best Recipes for Thanksgiving Cookies
The key to a great decorated cookie lies in using a dough that maintains its shape during baking and provides a delicious taste. Here are three excellent choices for your Thanksgiving cookies:
1. Sugar Cookie Dough
- Classic Choice: Sugar cookie dough is beloved for its simplicity and versatility. It offers a smooth, flat surface perfect for decorating and a mild flavor that complements a wide range of icings and toppings.
- Recipe Basics: Typically, sugar cookie dough includes ingredients such as flour, butter, sugar, eggs, vanilla extract, and a pinch of salt. The absence of leavening agents like baking powder helps the cookies maintain their shape.
2. Gingerbread
- Seasonal Flavor: Gingerbread adds a warm, spiced flavor profile that embodies the essence of Thanksgiving and the broader holiday season.
- Ingredients: This dough usually combines flour, butter, brown sugar, molasses, and an array of spices such as ginger, cinnamon, cloves, and nutmeg, creating rich and aromatic cookie bases.
3. Pumpkin Spice Dough
- Festive Twist: Incorporating pumpkin spice into your cookie dough brings a festive flair to your Thanksgiving treats.
- Custom Recipe: Start with a basic sugar cookie recipe and add pumpkin pie spice mix—typically a blend of cinnamon, nutmeg, ginger, cloves, and allspice. Optionally, mix in a small amount of pumpkin puree to enhance the flavor and texture.
Tips for Making Your Dough Stand Out
To elevate your Thanksgiving cookies, consider the following enhancements to your dough:
Flavor Enhancements:
- Extracts: Vanilla and almond extracts are standard choices that can be intensified or complemented by more unique flavors like maple, orange, or lemon zest to add depth.
- Spices: Incorporate spices such as cardamom or anise for a sophisticated twist on traditional flavors.
Texture Enhancements:
- Nuts: Finely chopped nuts like pecans or walnuts not only add a crunch but also a nutty flavor that pairs wonderfully with fall spices.
- Grains and Seeds: Consider adding a small amount of rolled oats, flax seeds, or poppy seeds for a subtle texture and health boost.
Consistency and Handling:
- Chill the Dough: Always chill your cookie dough before rolling and cutting. This step ensures the fat in the dough is firm, which helps prevent spreading and helps the cookies maintain their intricate shapes during baking.
- Rolling Thickness: For uniformly baked cookies, roll your dough to an even thickness, typically between 1/4-inch for crisp cookies and 3/8-inch for softer varieties.
4. Rolling and Cutting Dough for Decorating Thanksgiving Cookies
Once you’ve prepared your choice of cookie dough, the next step in your decorating Thanksgiving cookies journey is to roll and cut the dough into festive shapes. This process not only shapes your treats but also sets the stage for their final appearance and even baking. Here’s how to achieve the perfect dough thickness and explore fun Thanksgiving shapes to delight all ages.
Achieving the Perfect Thickness
Properly rolling out your cookie dough is crucial for uniform cooking and optimal decoration. Follow these tips to ensure your cookies bake evenly and hold their shape:
Uniformity:
- Consistent Thickness: Aim to roll your dough to about 1/4 inch thickness. This is generally the best thickness for cookies that are sturdy enough for decorating but not too thick to become doughy when baked.
- Checking Thickness: Use a ruler to check the thickness in multiple spots to ensure evenness across the entire batch.
Tools for Perfect Rolling:
- Rolling Pin Guides: These are adjustable rings that slide onto the ends of your rolling pin to help roll your dough to an exact thickness.
- Wooden Dowels: As an alternative to commercial rolling pin guides, place wooden dowels of the desired thickness on either side of your dough. Rolling over these dowels with your rolling pin can help maintain an even level.
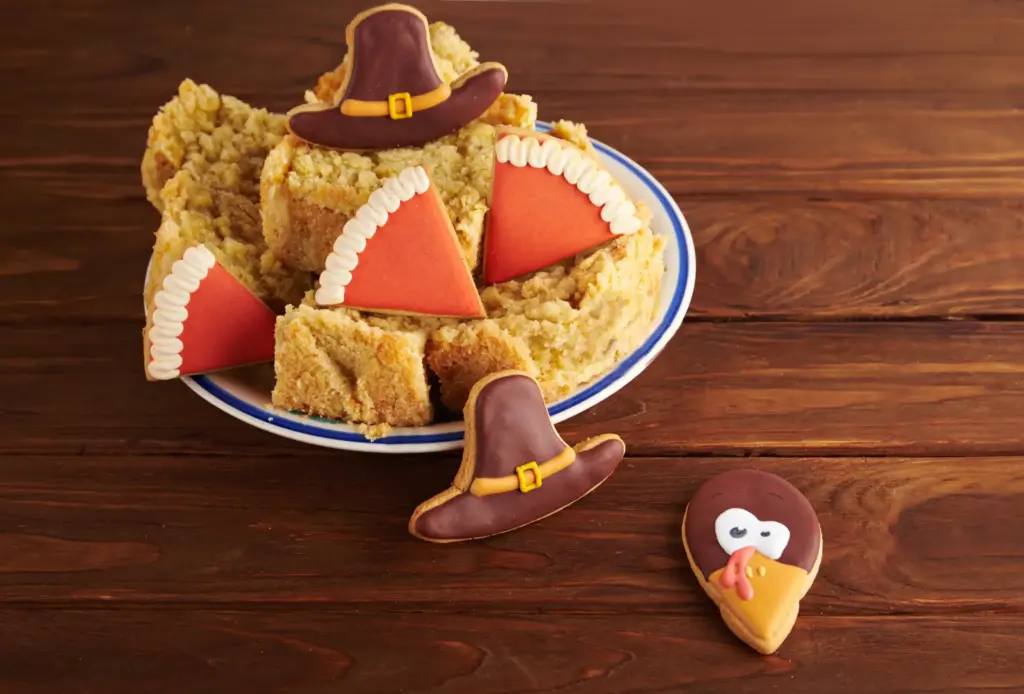
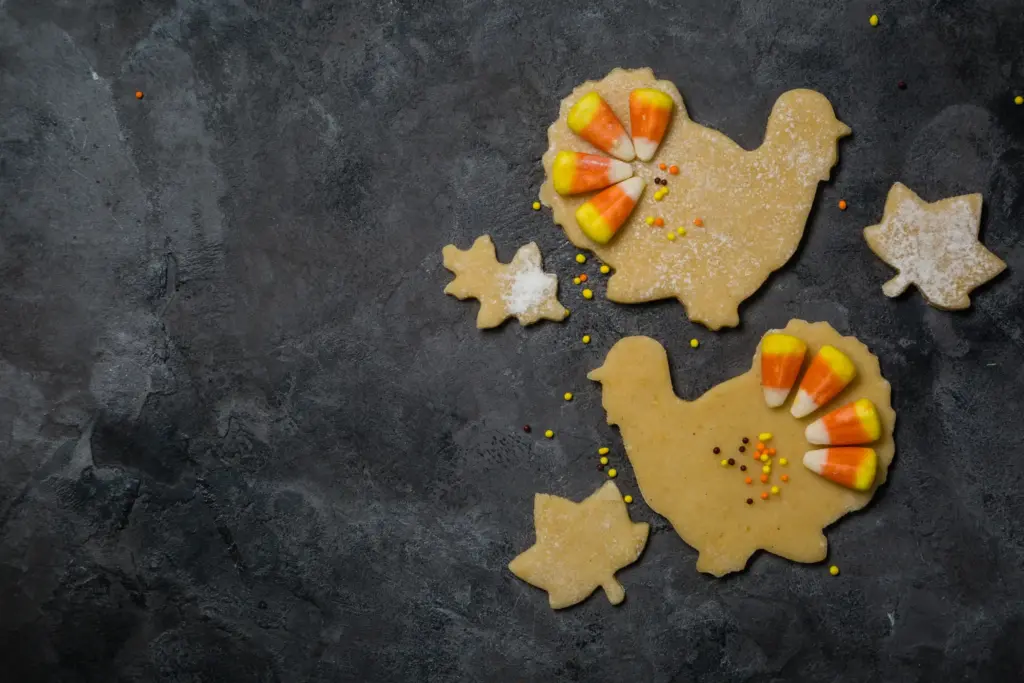
Fun Thanksgiving Cookie Shapes
Selecting thematic shapes for your cookies can add an extra layer of festivity to your Thanksgiving gathering. Here are some classic and fun ideas:
Classic Shapes:
- Leaves: Maple, oak, and other leaf-shaped cutters mirror the fall season beautifully. These shapes provide great edges and details for adding color with icing.
- Pumpkins: A quintessential symbol of fall and Thanksgiving, pumpkin-shaped cookies offer a broad surface for decorating intricate designs like jack-o’-lantern faces or simply beautiful gradients of orange.
- Turkeys: Turkey-shaped cookies are a hit with kids and adults alike. They provide a playful canvas for detailed decoration, such as feather icing patterns.
Unique Shapes:
- Acorns: Small and charming, acorn-shaped cookies can be a delightful addition to your Thanksgiving dessert table.
- Cornucopias: Symbolizing abundance and the harvest, cornucopia-shaped cookies can be decorated with a variety of colors to mimic overflowing fruits and grains.
Decorating Tips:
- Edible Markers: After baking and cooling, use edible markers to outline details before you fill in with icing.
- Textured Effects: Use different icing tips to create textures that mimic the natural lines in leaves or the segments of a pumpkin.
Cutting Techniques
- Dipping Cutters: Lightly dust your cookie cutters with flour to prevent sticking and achieve a clean cut.
- Refrigerating Dough: If the dough becomes too soft or warm, refrigerate it for 10-15 minutes to firm up. This makes cutting smoother and helps maintain the shape integrity during transfer to the baking sheet.
Handling and Transferring:
- Use a Spatula: Gently lift and transfer cut shapes with a thin spatula to prevent the dough from stretching or distorting.
5. Baking to Perfection
When it comes to decorating Thanksgiving cookies, the baking stage is just as crucial as the mixing or decorating stages. Properly baked cookies provide a flawless canvas for your artistic decorations. Here’s a comprehensive guide to ensure your cookies bake perfectly, supporting your creative decorating plans without issues like browning too quickly or uneven baking.
Oven Temperature and Timing
Getting the oven temperature and baking time right is pivotal for cookies that are evenly cooked and ready for decoration.
Optimal Temperature:
- Standard Heat: Bake your cookies at 350°F (175°C). This temperature is generally accepted as the best for achieving golden, evenly baked cookies without burning the edges or leaving the center doughy.
- Preheating: Always allow your oven to fully preheat to the desired temperature before placing your cookies inside. This ensures a consistent environment from the moment the cookies start baking.
Timing Considerations:
- Visual Cues: Watch for the edges of the cookies to just start turning golden. This usually occurs within 8-12 minutes, but can vary based on the size and thickness of your cookies.
- Set a Timer: To avoid overbaking, set a timer for a few minutes less than expected and check the cookies regularly until they are done to your liking.
Ensuring Even Baking
Uniform baking is essential for cookies, especially when you plan to decorate them. Unevenly baked cookies can lead to uneven icing application and less than perfect presentation.
Strategies for Even Baking:
Positioning:
- Center Rack: Always place your cookie sheet on the middle rack of the oven. This position allows for the most even heat circulation around the cookie sheet, preventing the bottoms from burning or the tops from browning too quickly.
- Single Batch: Avoid overcrowding the oven with multiple trays, as this can also lead to uneven baking. Bake one batch at a time for best results.
Rotation:
- Mid-Bake Adjustment: If you know your oven has hot spots or bakes unevenly, plan to rotate your cookie sheet 180 degrees halfway through the baking time. This helps to ensure that each part of the cookie gets the same exposure to the heat source.
Cooling Your Cookies
Once your cookies are baked, the cooling process is equally crucial.
Cooling Racks:
- Transfer to Cooling Rack: Remove the cookies from the oven and let them sit on the baking sheet for a couple of minutes. Then, using a spatula, transfer them to a cooling rack.
- Avoid Soggy Bottoms: Cooling racks allow air to circulate around the entire cookie, which helps to prevent soggy bottoms and ensures the cookies cool down quickly and evenly.
Timing Before Decorating:
- Fully Cooled: Make sure your cookies are completely cooled before beginning to decorate. Decorating warm cookies can cause icing to melt and decorations to slide off.
6. Mixing Icing Colors for Decorating Thanksgiving Cookies
Color plays a vital role in bringing your Thanksgiving cookies to life. The right palette not only enhances the visual appeal of your cookies but can also evoke the warmth and joy of the holiday season. Below, you’ll find detailed advice on choosing a color palette and techniques for mixing icing colors to ensure your cookies are as festive as they are delicious.
Seasonal Color Palettes for Thanksgiving
Choosing a color scheme that reflects the spirit of Thanksgiving will set the tone for your decorating. Here are some suggestions for selecting colors that resonate with the holiday:
Earthy Tones:
- Deep Greens: Symbolize the fading foliage of late autumn.
- Rich Browns: Reflect the earthy tones of the season and the Thanksgiving feast.
- Vibrant Oranges: Bring to mind pumpkin pies and crisp autumn leaves.
- Warm Yellows: Echo the golden hues of the harvest and late afternoon sun.
Accent Colors:
- Pops of Reds: Provide a bold contrast to earthier tones, reminiscent of cranberries and autumn berries.
- Golds: Add a touch of luxury and warmth, mimicking the soft glow of candlelight that is often associated with cozy Thanksgiving settings.
Mixing Techniques for Vibrant Colors
To achieve the perfect shade and consistency in your icing, follow these tips:
Choosing the Right Food Coloring:
- Gel Food Coloring: Opt for gel food coloring over liquid versions. Gel colors are more concentrated, providing vibrant color without requiring large quantities. This helps maintain the consistency of your icing, ensuring it’s neither too stiff nor too runny.
Techniques for Mixing Colors:
- Start Small: Begin with a small amount of coloring and gradually add more to avoid overly saturated colors. It’s easier to darken a light color than to lighten a dark one.
- Mixing for Consistency: Use a toothpick to add gel color to your icing. This method allows for better control over the amount and avoids contamination of the entire gel pot.
- Test and Adjust: After adding your initial color, mix thoroughly and let it sit for a few minutes. Colors can deepen as they set, so it’s important to wait and see the final shade before making adjustments.
- Creating Custom Shades: Don’t hesitate to mix different colors to create custom shades that perfectly match your Thanksgiving theme. For example, mixing red and yellow can give you a beautiful shade of orange that’s ideal for pumpkin-themed cookies.
Additional Tips for Perfect Color Application
- Consistent Application: Ensure your icing is at room temperature for easier mixing and application.
- Keeping Colors Vibrant: Once mixed, keep your icing covered with plastic wrap or a damp cloth to prevent it from drying out and to keep the colors vibrant.
- Practice Makes Perfect: Experiment with different shades and techniques on parchment paper before applying them to your cookies. This practice will help you feel more confident in your color mixing and application skills.
7. Piping Techniques

Mastering the art of piping is essential for creating detailed and visually appealing Thanksgiving cookies. Whether you are a novice or an experienced baker looking to refine your skills, understanding both basic and advanced piping techniques can transform your cookies into works of art. Here, we’ll explore these techniques in detail, ensuring you’re well-equipped to tackle any design you envision.
Basic Piping Skills
Developing a solid foundation in basic piping techniques is crucial for any cookie decorator. Here’s how to start:
Outlining Cookies:
- Purpose: Outlining creates a barrier to contain the flood icing, ensuring it doesn’t spill over the edges.
- Technique: Use a #2 or #3 tip for more control. Hold the piping bag at a 45-degree angle and gently squeeze to release a steady stream of icing, guiding it just inside the edges of the cookie.
- Consistency: The icing should be thick enough to hold its shape but fluid enough to create a smooth line without breaking.
Flooding Cookies:
- Purpose: Flooding fills in the outlined area with a thin, even layer of icing, providing a smooth, flat surface for further decoration.
- Technique: Use a thinner consistency icing for flooding. After outlining, quickly fill the interior space with a larger tip or cut a small piece off the end of a piping bag.
- Spreading Tool: Utilize a scribe tool or a toothpick to nudge the flood icing into tight corners and pop any air bubbles, ensuring an even layer.
Advanced Piping Techniques
Once you’re comfortable with the basics, you can explore more sophisticated methods to enhance your decorating Thanksgiving cookies efforts:
Layered Detailing:
- Technique: After your base flood layer has completely dried, pipe additional details on top to create depth and complexity in your design.
- Applications: Add fine lines to represent feathers on turkey-shaped cookies or intricate leaf veins on fall-themed designs.
- Tips: Use a very fine tip for precision and keep the icing thicker to avoid sinking into the flooded base.
Texturing:
- Technique: Different piping tips can create various textures that enhance the visual appeal of your cookies.
- Basketweave Tip: Perfect for creating a woven look, this tip can be used to mimic the texture of a cornucopia or a basket filled with harvest fruits.
- Grass Tip: Ideal for creating fur or grassy textures, this tip can add a realistic touch to animal-themed cookies or add greenery to a fall landscape.
Tips for Perfect Piping
- Consistent Pressure: Maintain steady pressure when piping to ensure uniform lines and shapes. Practice on parchment before moving to your cookies.
- Piping Gel: For very intricate designs, consider using piping gel, which offers a smoother flow and is ideal for very fine work.
- Practice Makes Perfect: Regularly practicing your piping on a silicone mat or waxed paper can help refine your skills without wasting cookies.
Cleaning and Maintenance
- Tip Care: Always clean your tips immediately after use to prevent icing from hardening inside, which can ruin fine details.
- Avoid Clogs: Strain your icing through a fine mesh sieve to remove any lumps that could block the tips during piping.
8. Adding Textures and Patterns to Decorating Thanksgiving Cookies
Textural elements and intricate patterns can significantly enhance the visual appeal and sophistication of your Thanksgiving cookies. This guide explores several techniques for adding these effects, allowing your cookies to not only taste delicious but also look exceptionally festive and detailed.
Creating Textured Effects
Adding texture to your cookies can create a more engaging and lively presentation. Here are a few techniques that are both simple and effective:
Stippling:
- Purpose: Stippling involves creating a series of small dots to build up a textured effect on the surface of the cookie.
- Technique: Use a small tip, such as a #1 or #2 round tip, and consistent pressure to pipe tight, regular dots. This technique is excellent for creating the appearance of feathers on a turkey cookie or adding texture to animal-themed designs.
- Tips for Success: Keep the dots close together but not touching to maintain the textured look without blending into a solid area.
Marbling:
- Purpose: Marbling combines two or more colors in a fluid, organic pattern, mimicking the natural veining found in stones or leaves.
- Technique: Outline the area with one color, then add small blobs of a contrasting color inside the outline. Use a toothpick or scribe tool to gently drag through the icing, swirling the colors together to create a marbled effect.
- Application: This method is particularly effective for autumn leaf cookies, where you can use fall colors to simulate the beautiful variations in a falling leaf.
Using Stencils and Stamps
For more uniform and repeatable patterns, stencils and stamps can be incredibly useful:
Using Stencils:
- Setup: Choose a stencil that fits the size and shape of your cookie. Hold the stencil flat against the cookie surface.
- Application: Apply a thin layer of royal icing over the stencil using a small offset spatula or a flat knife. Scrape off the excess to ensure the pattern is neat.
- Removal: Carefully lift the stencil straight up to reveal the design. Allow the pattern to set before proceeding with further decoration.
- Variety: Stencils are great for creating geometric patterns, detailed lace effects, or repetitive holiday motifs like pumpkins and leaves.
Using Stamps:
- Preparation: Ensure your stamps are clean and food-safe. Lightly dust them with flour to prevent sticking if necessary.
- Technique: Press the stamp into rolled-out cookie dough before cutting out the shapes. This method embosses the dough with your chosen design.
- Baking: After stamping, cut out the cookies and bake as usual. The stamped design will bake into the surface, providing a guide for further decoration or simply a subtle decorative touch.
Additional Tips for Enhanced Decoration
- Layering: Combine techniques for a more complex look. For example, use stenciling to create a base pattern, then add stippling or marbling for added depth.
- Highlighting: After applying textures or patterns, highlight key areas with contrasting colors or a touch of edible metallic paint to make the details pop.
- Practice: Experiment on parchment paper or leftover dough to refine your technique before applying it to the final cookies.
9. The Finishing Touches
The final touches you add to your Thanksgiving cookies can elevate them from merely pleasant to truly spectacular. This section of our guide focuses on adding those finishing details that make your creations stand out and provides tips on presenting and packaging your cookies in style. These steps are crucial in the process of decorating Thanksgiving cookies, as they add both visual appeal and a personal touch.
Adding Edible Decorations
Edible decorations not only enhance the aesthetics of your cookies but can also add texture and flavor. Here are some options to consider:
Sprinkles and Edible Glitters:
- Autumn Themes: Opt for sprinkles in shades of orange, yellow, red, and brown to reflect the season’s palette.
- Sparkle: Edible glitters in gold and copper can add a festive sparkle that catches the eye, perfect for a celebratory atmosphere.
Edible Paints:
- Metallic Touches: Gold, silver, and bronze edible paints can be used to add elegant details or to highlight certain elements of your cookie designs, such as the edges of a pumpkin or the veins of a leaf.
- Technique: Use a fine brush for small, delicate details, or larger brushes for sweeping highlights.
Creative Presentation Ideas
Once your cookies are decorated, how you present them can significantly impact their reception. Whether sharing them at a family gathering or packaging them as gifts, here are some creative ideas:
Cookie Platters:
- Aesthetic Arrangement: Arrange your cookies thoughtfully on a platter, grouping similar colors and shapes or creating a gradient effect. Consider layering cookies of different sizes to add depth to the presentation.
- Thematic Elements: Add elements like mini pumpkins, pinecones, or colorful leaves to the platter to enhance the Thanksgiving theme.
Packaging:
- Gift Giving: For cookies that are being given as gifts, consider packaging them in clear cellophane bags. This not only protects the cookies but also showcases the decorative details.
- Festive Accents: Tie the bags with ribbons in autumnal colors, and add a personalized tag with a festive message or the cookie flavor. This can make the gift feel more personal and thoughtfully prepared.
- Boxes and Baskets: For a more substantial gift, arrange multiple cookies in a decorative box or a small basket, cushioned with tissue paper or festive shreds.
Tips for Maintaining Quality in Presentation
- Transporting: Ensure cookies are fully set before arranging or packaging to avoid smudging the decorations. Use parchment layers between stacked cookies if needed.
- Freshness: If cookies need to be stored before serving or gifting, keep them in an airtight container to maintain freshness. Avoid stacking or overcrowding to preserve the integrity of your decorations.
10. Storage and Preservation
After you’ve spent time creating beautiful Thanksgiving cookies, it’s essential to know how to store and preserve them effectively. Proper storage ensures they remain as delightful to eat as they are to look at, whether you’re saving them for the holiday or sharing them sooner. Maintaining the freshness and visual appeal of your cookies involves a few key practices:
Best Practices for Storage
- Let the Icing Harden Completely: Before storing your cookies, it’s crucial to let the icing harden fully. This can take several hours or even overnight, depending on the thickness and type of icing used.
- Use Airtight Containers: Once the icing is set, place the cookies in airtight containers. To prevent the cookies from sticking to each other, layer them between sheets of parchment paper.
- Keep at Room Temperature: Most decorated cookies will stay fresh for about a week when stored at room temperature. Find a cool, dry place away from direct sunlight to keep the colors vibrant and the icing intact.
Tips for Long-Term Storage
If you need to keep your cookies fresh longer than a week, consider these options:
- Freezing: Decorated cookies can be frozen for up to 3 months. Place them in a single layer on a baking sheet to freeze them individually first. Once they’re frozen, transfer them to an airtight container, layering them with parchment to prevent sticking. When you’re ready to serve them, thaw the cookies at room temperature while still in the container to avoid condensation, which can spoil the decorations.
- Avoid Humidity: High humidity can soften cookies and cause the icing to bleed. If you live in a humid climate, using silica gel packs in your storage containers can help absorb excess moisture.
11. Conclusion
Decorating Thanksgiving cookies is more than just a baking project; it’s a creative expression that adds warmth and personal touch to your holiday celebrations. By following the techniques and tips outlined in this guide—from preparing the perfect dough to applying intricate icing designs—you’ll be able to create stunning cookies that will impress your guests and become a cherished part of your Thanksgiving traditions.
I encourage you to experiment with different designs, flavors, and textures to find what works best for you and your family. Remember, the most important part is to have fun and enjoy the process of creating something beautiful and delicious.
12. FAQs
- What is the best icing to use for cookie decorating?
Royal icing is ideal for detailed work because it dries hard and smooth, making it perfect for intricate designs and layering. - How far in advance can I make my Thanksgiving cookies?
You can bake and decorate cookies up to a week in advance if stored properly at room temperature, or up to three months in advance if frozen. - Can I use natural food coloring for my cookies?
Yes, natural food colorings are a great option if you’re looking for a healthier alternative, though they may produce more muted colors. - How do I prevent my cookies from spreading during baking?
Ensure your dough is chilled thoroughly before baking, and avoid placing dough on hot baking sheets. - What’s a good way to transport decorated cookies without damaging them?
Use a sturdy cookie box with dividers or place them side by side in a single layer on a flat tray or in a container, separated by parchment paper to prevent them from moving and touching each other.
Resources
- https://www.cosmopolitan.com/style-beauty/fashion/g37233214/gift-ideas-for-thanksgiving/
- https://www.ediblearrangements.com/blog/thoughtful-thanksgiving-gift-ideas/


