Harry Potter Decorated Cookies: A Guide to Magical Baking

1. Introduction
Harry Potter themed parties and events often call for special treats that not only tantalize the taste buds but also enchant the eyes. One of the most delightful ways to bring a touch of magic to any wizarding event is through beautifully decorated cookies inspired by the rich world of Harry Potter. Whether you’re a seasoned baker or a beginner, this guide will walk you through the process of creating your own Harry Potter decorated cookies, from choosing iconic designs to mastering the art of watercolor decoration.
2. Choosing Your Harry Potter Designs
When it comes to Harry Potter cookies, the design is everything. Start by selecting images that are instantly recognizable to any fan. Think of the Hogwarts crest, the symbols of the four houses—Gryffindor, Slytherin, Ravenclaw, and Hufflepuff—or even the snitch or Harry’s glasses. The key is to pick designs that not only look magical but are also feasible to recreate with icing.
Why Design Matters
A well-chosen design serves as the blueprint for your decorating process. It influences the colors you will use and the complexity of the decorating techniques involved. Good designs should balance simplicity with visual impact, ensuring that the cookies are both delightful and doable.
Examples of Popular Designs
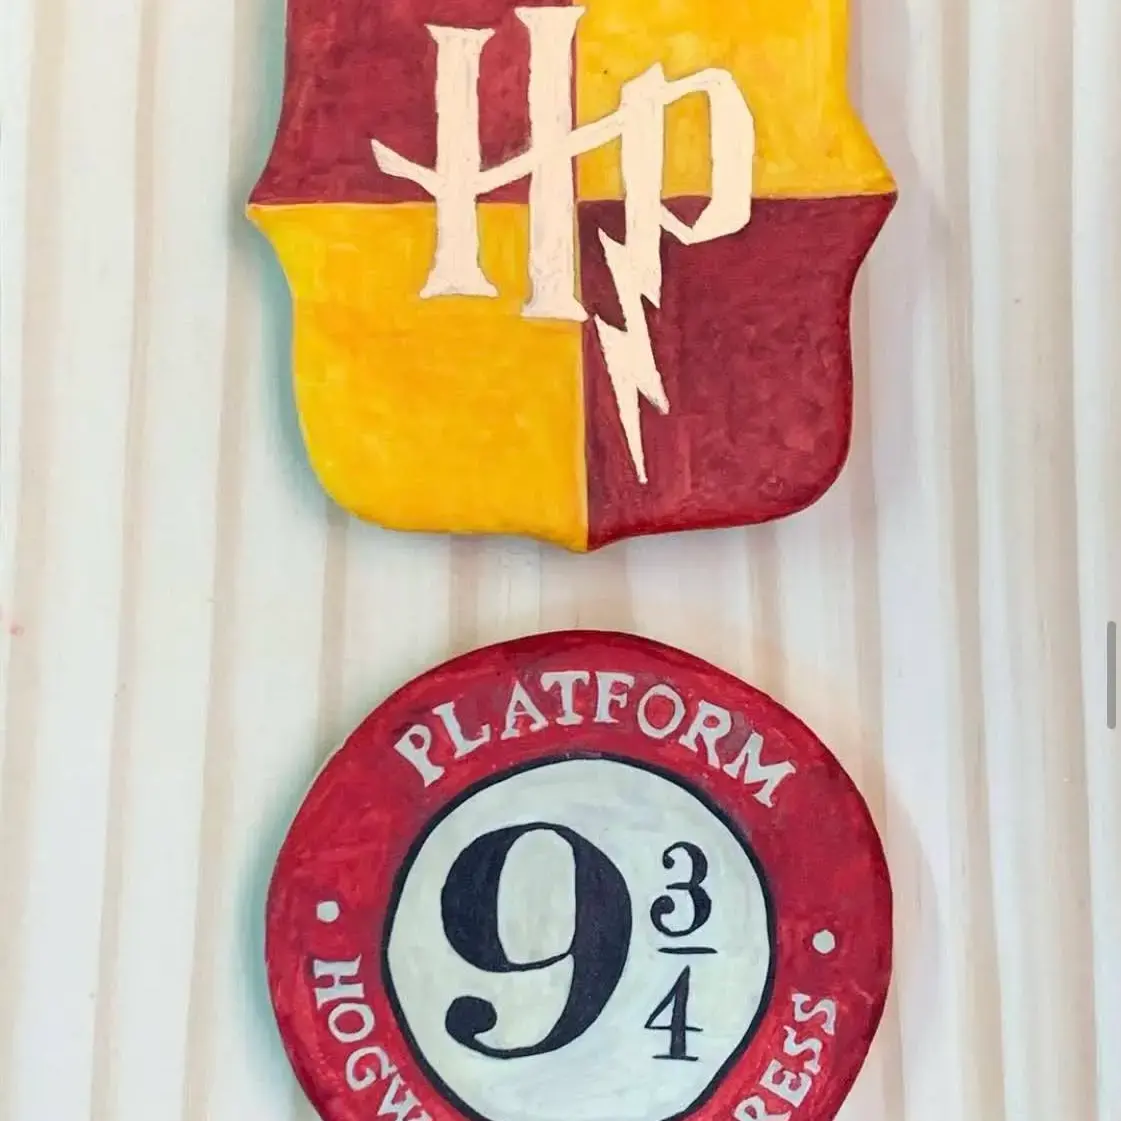
- Hogwarts Crest: A vibrant design featuring the Hogwarts school crest is a favorite. It incorporates various colors and can be a showstopper at any party.
- House Emblems: Cookies decorated with the emblems of the four Hogwarts houses can be used to personalize the treat for guests depending on their favorite house.
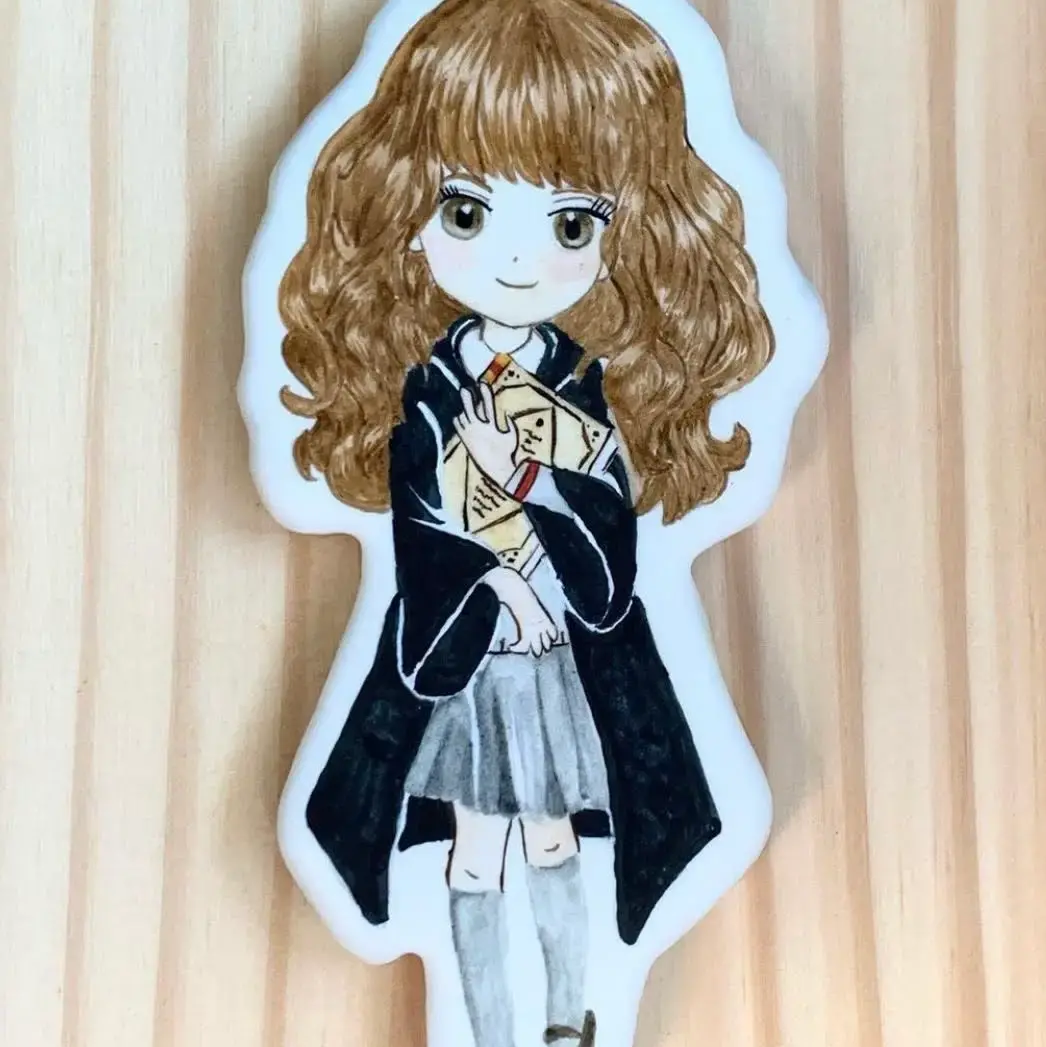
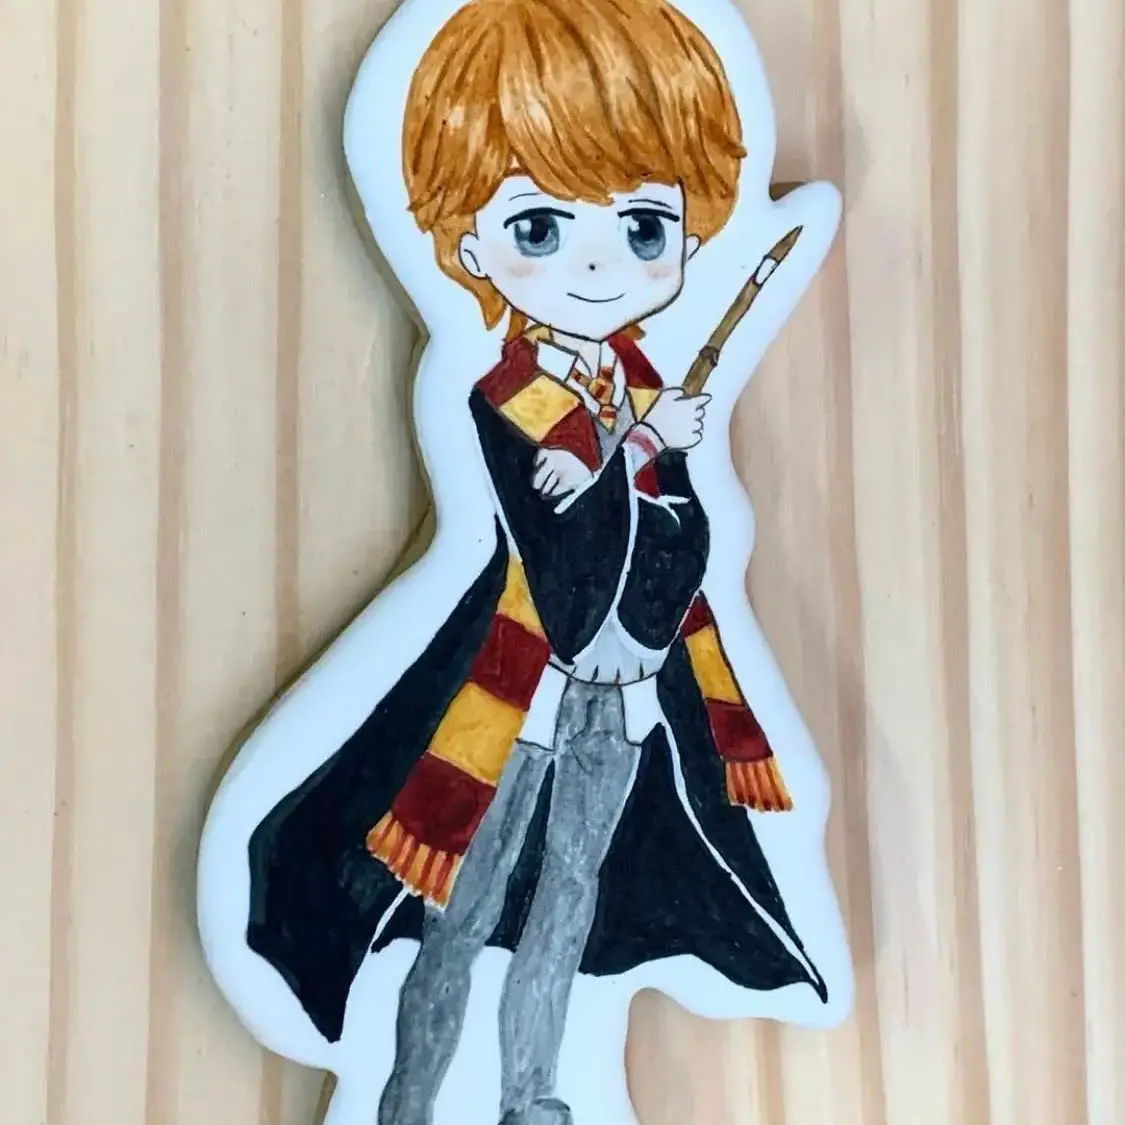
- Character Silhouettes: Using silhouettes of popular characters like Harry, Hermione, and Ron can make the cookies feel personal and connected to the story.
3. Materials Needed for Decorating Cookies
Creating “Harry Potter decorated cookies” requires not only creativity and skill but also the right set of tools and materials. Whether you’re crafting these magical treats for a party, a fan event, or just for fun, having the proper supplies will make the process much smoother and more enjoyable. Here’s a detailed breakdown of the materials you’ll need to bring your Harry Potter-themed cookies to life.
Basic Baking Supplies
To start, you’ll need a few basic baking essentials. These are crucial for making cookies that not only taste great but also provide a perfect canvas for decoration.
- Cookie Dough: Choose a cookie dough that retains its shape well during baking. A classic sugar cookie dough is ideal because it produces a smooth, flat surface that is excellent for decorating. Here’s what to look for in your dough:
- Stiffness: The dough should be firm enough to hold the intricate details of Harry Potter designs.
- Flavor: While plain sugar cookie dough is standard, feel free to experiment with flavors like vanilla or almond to add an extra layer of delight.
- Rolling Pin: A good rolling pin is essential for evenly rolling out your dough to your desired thickness. Consistent thickness ensures uniform baking and provides a level surface for your artistic endeavors.
- Cookie Cutters: These are used to cut out shapes that align with your Harry Potter theme. You can find cutters shaped like stars (for the Dark Mark or magic sparks), glasses (for Harry), lightning bolts, and more. Custom-made cutters can also be ordered online if you have a specific design in mind.
Decorating Tools
Once your cookies are baked and cooled, it’s time to decorate! Here are the tools you’ll need to detail your cookies with Hogwarts-worthy artistry.
- Piping Bags and Tips: Essential for precise icing application, piping bags fitted with various tips will help you create everything from broad outlines to intricate details. Here are a few tips to consider:
- Round tips: Perfect for outlining and filling.
- Star tips: Great for adding texture.
- Fine tips: Ideal for minute details like facial features or tiny symbols.
- Food Coloring: To capture the vivid colors of the Harry Potter world, opt for gel food colors. These are preferable because they provide intense color without thinning the icing. Here’s how to use them effectively:
- Add gradually: Start with a small amount and add more to achieve the desired shade.
- Mix colors: Combine different colors to get the perfect hue for Hogwarts house crests or spell effects.
- Fine Brushes: When finer details or a painted effect is required, fine brushes are your go-to tools. They work wonderfully with the watercolor technique or for adding highlights and shadows to give depth to your designs.
Special Equipment: Cookie Projector
For those who want to ensure every detail of their Harry Potter decorated cookies is just right, a cookie decorating projector is a game-changer.
- Cookie Decorating Projector: This innovative tool projects images directly onto your cookies, allowing for precise tracing and detailing. It’s particularly useful for complex designs like the Hogwarts castle or intricate character portraits. Here’s why it’s beneficial:
- Precision: Projects clear images for easy tracing.
- Versatility: Adjustable settings let you resize images to fit different cookie sizes.
- Ease of Use: Simplifies the process of applying detailed designs, making it accessible even for beginners.
4. Baking Your Cookies

Baking the perfect batch of “Harry Potter decorated cookies” starts with the preparation of the cookie itself. The base cookie not only needs to taste delicious but also must serve as an ideal canvas for intricate decorations. Below, I will provide detailed guidance on crafting the best cookies for decorating, which will enhance the overall quality and aesthetic of your Harry Potter-themed creations.
Recommended Cookie Recipes
When it comes to decorated cookies, not all recipes are created equal. Here are two highly recommended options that are perfect for holding detailed designs and adding a touch of magic to any Harry Potter gathering:
- Sugar Cookies: Sugar cookies are the gold standard for decorated cookies due to their smooth, firm surfaces that are ideal for intricate icing work. Here’s what makes them so great:
- Texture: They bake up firm and flat, which is crucial when applying detailed decorations.
- Flavor: Mild and buttery, they provide a versatile base that pairs well with the bold flavors of various icings and decorations.
- Customization: Easily flavored with extracts like vanilla, almond, or lemon to enhance the overall taste without compromising the dough’s consistency.
- Gingerbread Cookies: For those looking for a cookie with a bit more flavor, gingerbread is a sturdy alternative that brings warmth and spice to your Harry Potter party, especially during the colder months or holiday-themed events.
- Robust flavor: The rich mix of ginger, cinnamon, and molasses offers a delightful contrast to the sweet decorations.
- Sturdy texture: Ideal for supporting heavier or layered decorations without bending or breaking.
Tips for Making a Stable Cookie Surface
Achieving a smooth and even surface on your cookies is essential for detailed decorating. Here are some tried and true tips to ensure your cookies bake perfectly every time:
- Chill Your Dough: This step is crucial for preventing the cookies from spreading out and losing their shape during baking.
- Time: Chill the dough for at least 1 hour, or overnight if possible, to allow the fats in the dough to solidify, which helps maintain the shape.
- Handling: Minimize handling the dough with warm hands to keep it cool and firm.
- Roll to Even Thickness: Consistent thickness is not just about uniform cooking; it’s also about creating a flat surface that’s ideal for decorating.
- Use rolling guides: Place wooden dowels or silicone rings on the sides of your dough when rolling it out to achieve uniform thickness.
- Check frequently: Rotate and flip the dough occasionally while rolling to ensure it does not stick to the surface and maintains an even thickness.
- Use Parchment Paper: Baking on parchment paper not only prevents sticking but also allows you to transfer cookies to and from the baking sheet without distorting their shapes.
- Pre-cut shapes: You can cut the dough directly on parchment and remove the excess, then transfer the parchment onto your baking sheet, reducing the need to move individual cookies.
5. Introduction to Watercolor Technique
Creating “Harry Potter decorated cookies” with a touch of artistic flair can be particularly enchanting when you use the watercolor technique. This method allows you to bring a range of delicate designs and subtle color variations to your cookies, making them not only delicious treats but also small works of art. Whether you’re aiming to depict the intricate designs of the Marauder’s Map or the vibrant colors of house crests, the watercolor technique is your gateway to achieving stunning visual effects.
What is the Watercolor Technique?
The watercolor technique in cookie decorating is a process where you apply a thin, translucent layer of edible paint to the hardened icing of a cookie. Here’s how it generally works:
- Diluting Gel Food Coloring: Start by diluting gel food coloring with a small amount of vodka or a clear extract like lemon or vanilla. The alcohol or the extract serves a crucial function—it evaporates quickly, preventing the icing from becoming soggy while allowing the colors to blend beautifully.
- Applying the Paint: Using fine brushes, the diluted colors are then painted onto the cookie’s icing surface. This can be done in layers to build up the desired intensity and complexity of the design.
This technique is favored for its ability to create soft backgrounds and sharp, intricate details alike. The versatility it offers makes it perfect for themed cookies, especially those requiring a nuanced artistic touch like “Harry Potter decorated cookies.”
Why It’s Suitable for Delicate Designs
The watercolor technique is particularly suited for delicate designs for several reasons:
- Subtle Color Blending: It allows for gentle blending of colors, which is ideal for achieving the whimsical, ethereal quality of many Harry Potter themes. Whether you are painting a Patronus or the detailed script of the Marauder’s Map, the watercolor technique can capture the subtlety of these designs with a soft, painterly effect.
- Layering for Depth: You can layer colors to create depth and shadow, adding a three-dimensional look to flat cookies. This is particularly useful for depicting more complex scenes or characters from the Harry Potter series.
- Precision in Details: Despite the fluidity of the medium, using fine brushes and a steady hand allows for incredibly detailed work. This precision is crucial for accurately rendering small features like the tiny text on the Daily Prophet cookies or the intricate crest of Hogwarts.
- Customization of Hues: Since you can mix virtually any color, this technique is perfect for customizing hues to match the specific shades associated with different Harry Potter houses or magical elements, enhancing the thematic feel of your cookies.
To successfully utilize the watercolor technique on “Harry Potter decorated cookies,” follow these additional tips:
- Prepare Your Base: Ensure your icing is completely dry and hard before you start painting. A royal icing base is best because it provides a smooth, firm surface.
- Test Colors First: Experiment on a similar texture or a spare cookie to test how your color mixtures look when dried.
- Work Quickly but Carefully: Since the alcohol or extract in the paint dries quickly, work swiftly to blend your colors but do so with care to avoid smudging.
- Seal the Paint: Once your design is complete and the paint has dried, consider applying a clear edible sealant spray to protect the paint from damage and preserve the colors.
6. Preparing Your Icing
When crafting “Harry Potter decorated cookies,” one of the most critical steps is preparing the icing. The right icing serves as the foundation for any decorative work, especially if you’re planning to use the watercolor technique. Royal icing is the go-to choice for such tasks due to its optimal texture and hardening properties, which make it suitable for detailed and delicate painting.
Recipes for Watercolor-Compatible Icing
Royal Icing
Royal icing is preferred for decorating cookies, particularly when employing the watercolor technique. This type of icing dries smooth and firm, creating a perfect canvas for your edible art. Here’s how to make it:
- Ingredients:
- 3 cups powdered sugar
- 2 egg whites
- 1/2 teaspoon cream of tartar
- 1 teaspoon vanilla extract (or lemon for a less sweet base)
- Directions:
- In a large bowl, beat the egg whites with the cream of tartar until frothy.
- Gradually add powdered sugar until the mixture is glossy and holds stiff peaks.
- Add flavoring and beat until just combined.
- If the icing is too stiff, add water a few drops at a time until it reaches the desired consistency.
- Use immediately or store in an airtight container as royal icing hardens when exposed to air.
Coloring Your Icing
The ability to customize your icing color is crucial for “Harry Potter decorated cookies,” as it can elevate the design and make the details pop. Here’s how to color your royal icing for the best effects:
- Consistency is Key:
- The right consistency of your royal icing is critical for successful application. It should be fluid enough to spread smoothly but thick enough to hold its shape. When piped, it should hold a line but smooth out within seconds.
- Test the consistency: To check, drag a knife through the center of your icing; the line should hold briefly then disappear after about 15 seconds. This is often referred to as “15-second icing.”
- Adding Color:
- Gel Food Coloring: Choose gel food colors for more vibrant and precise hues. Unlike liquid food coloring, gel doesn’t alter the consistency of the icing.
- Mixing Colors: Add coloring a little at a time, using a toothpick or the tip of a knife, until you achieve the desired shade. For thematic “Harry Potter decorated cookies,” think about using house colors or shades that match elements like Harry’s scarf, the golden snitch, or spell effects.
- Allow to Settle: Once colored, let the icing sit for a few minutes. This allows the color to fully develop and any air bubbles to rise to the surface.
Final Tips for Icing Preparation
- Keep Covered: Royal icing dries out quickly. Keep it covered with a damp cloth or plastic wrap when not in use.
- Stir Regularly: Before using, give your icing a gentle stir to bring back its smooth consistency without introducing too many air bubbles.
- Plan for Shades: Prepare multiple shades of the same color to add depth to your designs, such as darker blues for Ravenclaw or varying greens for Slytherin themes.
7. Applying Base Icing
For those looking to create “Harry Potter decorated cookies,” applying a flawless base layer of icing is critical. This foundation not only enhances the appearance of the cookies but also ensures that any further decorating techniques, such as the watercolor method, can be executed with precision. Here’s a detailed guide on how to apply and perfect your base icing, ensuring that every cookie looks professionally made.
Techniques for a Smooth Application
Creating a smooth and even base layer is essential for detailed cookie decorating. Here are the steps and tips to achieve a perfect base:
Outline and Flood
- Outline the Cookie:
- Tools Needed: Use a piping bag fitted with a small round tip.
- Technique: Carefully pipe a border around the edge of your cookie. This border will contain the flood icing and create a clean, defined edge.
- Tip: Make sure the outline is continuous without breaks to prevent the flood icing from leaking out.
- Flood the Interior:
- Preparing Flood Icing: The flood icing should be thinner than the outline icing but not so runny that it loses shape. Adjust with small amounts of water or more powdered sugar to get the right consistency.
- Application: Fill the inside of the outlined area with the flood icing. Use a piping bag or a squeeze bottle for better control.
- Spreading: Use a toothpick or a scribe tool to help spread the icing evenly across the surface, nudging it into corners and edges.
Pop Any Bubbles
- Technique: After flooding the cookie, tiny air bubbles may appear on the surface of the icing.
- Tool: Use a toothpick or a scribe tool to pop these bubbles. This step is crucial as it prevents blemishes on your cookie’s surface and ensures a smooth finish.
- Tip: Do this quickly after flooding as the icing begins to dry and set; popping bubbles in drying icing can leave marks.
Letting the Base Layer Harden
Once your base layer of icing is applied, it’s imperative to let it dry completely:
- Drying Time: Allow the icing to dry thoroughly, which can take anywhere from a few hours to overnight, depending on the humidity and thickness of the icing layer.
- Environment: Try to dry your cookies in a cool, dry place to avoid humidity, which can prolong the drying process and affect the smoothness of the icing.
- Testing for Dryness: To check if the icing is dry, lightly touch one of the cookies in an inconspicuous area. If it feels firm and dry, and your finger comes away clean, the icing is set.
Final Tips for a Perfect Base Layer
- Consistency is Key: Before starting, ensure both your outline and flood icing are of the correct consistency. This prevents issues like the icing being too runny or too stiff, which can affect the final look.
- Prepare in Batches: If decorating many cookies, prepare a large batch of icing and keep it covered with a damp cloth or plastic wrap to prevent it from drying out.
- Practice Patience: Give your cookies enough time to dry completely. Rushing into decorating with a wet base can ruin detailed designs.
8. Watercolor Technique Steps
Mastering the watercolor technique on “Harry Potter decorated cookies” can transform simple sugar cookies into extraordinary pieces of edible art, capturing the essence of the wizarding world with every brushstroke. This method involves a delicate balance of color mixing, application, and blending to achieve a magical finish. Here’s a step-by-step guide to help you perfect this artistic endeavor.
Mixing Colors
The first step in the watercolor technique is preparing your palette. This is where you’ll create the custom colors that will bring your “Harry Potter decorated cookies” to life.
- Choosing Your Colors: Select gel food coloring that corresponds with the designs you plan to paint. For Harry Potter themes, consider colors that represent house colors, magical creatures, or mystical elements.
- Preparing the Palette: Use a small palette or a clean plate to mix your colors. Add a drop of gel color and a few drops of vodka or a clear extract like lemon extract. The alcohol or extract serves a crucial role—it evaporates quickly, preventing the icing from becoming overly moist and helps the colors to set on the icing without bleeding.
- Consistency: Aim for a paint-like consistency that’s not too runny. It should be fluid enough to spread smoothly but thick enough to provide vibrant coloration without dripping.
Applying the Watercolor
Once your palette is ready, you can begin applying the colors to your cookies.
- Start with Light Washes: Initially, apply lighter colors as a base. These can form the background of your designs, such as pale blue for the sky or light green for grass.
- Gradual Layering: Gradually add more layers, allowing each to dry slightly before applying the next. This technique helps build depth and intensity without the colors running into each other.
- Clean Brushes: Use a clean brush for each color to maintain the purity and vibrancy of your hues. Have a cup of water and a paper towel handy to rinse and dry brushes between colors.
Blending Techniques
Blending is essential for creating a natural and seamless transition between colors, enhancing the visual appeal of your “Harry Potter decorated cookies.”
- Soft Blends: While the paint is still wet, use a clean, slightly damp brush to gently blend the edges of different colors. This technique is particularly useful for creating smooth transitions in skies, robes, or magical effects.
- Layering for Depth: After applying and slightly drying the initial washes, add darker shades or detailed lines to create definition and shadow. This adds dimension and makes your designs pop.
- Drying Times: Be mindful of drying times; allowing the paint to set between layers will prevent colors from bleeding into each other, maintaining sharpness in your details.
Final Touches
- Detailing: Once the base layers are dry, you can add fine details such as facial features, text, or intricate patterns using a fine-tip brush.
- Protecting Your Work: After your cookies have completely dried, consider using an edible varnish or glaze to protect the painted surface, especially if they need to be transported.
9. Using a Cookie Decorating Projector
In the enchanting world of baking, “Harry Potter decorated cookies” can bring a bit of magic to any gathering. To achieve the precision needed for intricate designs reminiscent of the Harry Potter universe, using a cookie decorating projector is highly recommended. This tool simplifies the process of applying detailed graphics onto cookies, ensuring both accuracy and efficiency. Here’s a detailed guide on how to effectively utilize a cookie decorating projector to elevate your cookie decorating skills.
Setting Up the Projector
Proper setup of your cookie decorating projector is crucial for success. Here are steps to ensure your projector is ready to assist in creating detailed cookie decorations:
- Choose a Stable Surface: Begin by placing your projector on a stable, level surface. Stability is key to prevent any movement that could disrupt the accuracy of your designs.
- Align the Projector: Adjust the projector so that it directly faces the area where you’ll be working. Ensure the projection path is unobstructed.
- Focus the Projection: Use the focus adjustment on your projector to sharpen the image. The design should be crisply projected onto the cookie’s surface, with all details clearly visible.
- Select Your Design: Choose a design that fits well within the size of your cookies. This might include iconic symbols like the Hogwarts crest, Harry’s glasses, or the Golden Snitch. Ensure the image is appropriately sized and oriented before you begin tracing.
Benefits of Using a Projector
Using a cookie decorating projector comes with several advantages that make it an invaluable tool for anyone looking to create “Harry Potter decorated cookies” with intricate designs:
- Accuracy: The projector allows for the precise replication of designs, ensuring that even the most complex patterns are detailed and accurate. This is particularly useful for character faces, intricate crests, and detailed script.
- Efficiency: When decorating multiple cookies with the same design, a projector speeds up the process significantly. It eliminates the need for manual transfers or sketching, allowing for quick and consistent results across batches of cookies.
- Consistency: Every cookie will have the same quality and detail, which is especially important when creating themed sets for events or parties.
Step-by-Step Guide on Using a Cookie Decorating Projector
Following these steps will help you maximize the effectiveness of your cookie decorating projector:
- Position Your Cookie:
- Place the cookie on a flat surface directly under the projector’s lens.
- Adjust the placement until the design aligns perfectly with the cookie’s surface.
- Trace the Design:
- Using a fine-tip edible marker or a very thin brush dipped in dark icing, carefully trace the projected image onto the cookie.
- Maintain a steady hand to keep the lines smooth and consistent.
- Fill in the Details:
- Once the outline is in place, begin filling in the larger areas with base colors using the watercolor technique or thinned royal icing.
- For detailed work within the design, switch to finer brushes or switch back to the edible marker to add depth and texture.
- Final Touches:
- Review the cookie for any missed spots or areas that may need a color boost.
- Allow the cookie to dry completely before adding any additional layers or final touches.
10. Adding Final Touches

Adding final touches to your “Harry Potter decorated cookies” is an essential step in the decorating process. It’s these details that truly bring the magic of the wizarding world to life on your cookies. By using fine brushes for delicate detailing and edible markers for crisp lines, you can elevate the visual appeal and ensure your cookies are as captivating as they are delicious. Here’s a detailed guide to help you master these finishing techniques.
Detailing with Fine Brushes
When it comes to adding intricate details to your cookies, the right tools make all the difference. Fine brushes play a crucial role in achieving precision and subtlety in your designs.
- Selecting Brushes:
- Choose a variety of fine-tipped brushes that are specifically designed for food use to ensure safety and effectiveness.
- Opt for synthetic brushes which are durable and can maintain a sharp point for detailed work.
- Techniques for Using Fine Brushes:
- Dip Lightly: You only need a small amount of edible paint on your brush. Dip lightly to avoid overloading the brush, which can lead to smudging.
- Steady Hand: Keep a steady hand while painting details like the intricate lines of a Hogwarts house crest or the delicate features of a character’s face.
- Layer Colors: Build up colors gradually. Start with lighter shades and gradually add darker tones to create depth and realism.
- Applications:
- Use these brushes to add fine lines, such as the tiny stitches on a Quidditch uniform or the individual bricks on the Hogwarts castle.
- They are also perfect for creating facial expressions on character cookies, adding minute details that bring the characters to life.
Accentuating Features with Edible Markers
Edible markers are another essential tool in your cookie decorating arsenal, especially when it comes to defining designs and adding text.
- Choosing Edible Markers:
- Select markers that are specifically made for use on food. Ensure they have fine tips for detailed work.
- Consider a range of colors to match the diverse themes of Harry Potter, from dark greens and blues for Slytherin to vibrant reds for Gryffindor.
- Using Edible Markers:
- Outline for Emphasis: After your base and detail paints have dried, use an edible marker to outline elements of your design to make them stand out.
- Text Writing: Edible markers are ideal for adding text, such as names, spells, or quotes from the Harry Potter books.
- Correcting Mistakes: Markers can also be used to correct small mistakes made with icing by covering them up or integrating them into the design.
- Techniques for Best Results:
- Allow Icing to Dry Completely: Before using markers, make sure your icing is completely dry to avoid denting the surface.
- Gentle Pressure: Apply gentle pressure to avoid puncturing the icing. Practice on scrap icing to get a feel for the marker before applying it to the actual cookie.
Final Review and Adjustments
Once you have completed the detailing and accentuating stages, do a final review of your cookies.
- Touch-ups: Look for any areas that might need additional color or a cleaner line and make the necessary adjustments.
- Varnishing: For added shine and to protect your artwork, consider applying a clear edible varnish or glaze over the cookie. This step not only enhances the appearance but also helps preserve the details longer.
11. Preservation and Presentation of Cookies
Creating “Harry Potter decorated cookies” is only part of the fun—preserving their freshness and presenting them in enchanting ways add to the magical experience. Here’s how to ensure that your cookies remain delightful long after they’ve been decorated, along with tips for throwing a Harry Potter-themed cookie decorating party.
How to Keep Decorated Cookies Fresh
Ensuring that your beautifully decorated cookies stay fresh and delicious is crucial, especially if you’re preparing them in advance of an event or as gifts.
- Airtight Containers: Store your cookies in airtight containers to keep them from drying out or absorbing moisture from the air, which can spoil their texture and appearance.
- Room Temperature: Keep the containers at room temperature in a cool, dry place away from direct sunlight, which can cause the colors to fade and the icing to soften.
- Layering: If you need to stack your cookies, place a piece of parchment paper between each layer to prevent them from sticking together or damaging the icing.
Creative Packaging Ideas
Presentation is key, especially when your cookies are as visually stunning as “Harry Potter decorated cookies.” Here are some creative ideas for packaging:
- Themed Boxes: Choose boxes that reflect the Harry Potter theme. Boxes with windowed lids are particularly effective as they allow a sneak peek at the magical treats inside without opening the box.
- Ribbon and Tags: Decorate your cookie boxes with ribbons in Hogwarts house colors or with charms that look like tiny brooms or wands. Add personalized tags with quotes from the Harry Potter books or a simple “Made with magic” note.
- Custom Labels: Design labels that feature classic Harry Potter symbols, such as the Hogwarts crest, a snitch, or even the Deathly Hallows symbol, depending on your cookie designs.
12. Harry Potter Cookie Decorating Party Tips
Hosting a Harry Potter-themed cookie decorating party is a fantastic way to share the magic with friends and family. Here’s how to make your party unforgettable:
Ideas for a Themed Decorating Party
- Costume Invites: Send out invitations encouraging guests to come dressed as their favorite characters from the Harry Potter universe. This adds an extra layer of fun and immerses everyone more deeply into the theme.
- Decorating Stations: Set up multiple decorating stations, each themed around different aspects of Harry Potter. For example, one station could be dedicated to Slytherin, with green and silver decorations and serpent designs, while another could focus on magical creatures like Nifflers or Owls.
Games and Activities
Interactive games and activities can keep the energy lively and engaging throughout the party.
- Cookie Decorating Contest: Organize a contest to see who can create the most creative or technically accomplished cookie. Offer small prizes for categories like ‘Best Use of Color,’ ‘Most Magical,’ and ‘Best Character Likeness.’
- Harry Potter Trivia: Prepare a trivia game based on the Harry Potter books and films. Include questions of varying difficulty to cater to all levels of fans, and consider themed prizes for the winners.
- Wizarding World Photobooth: Set up a corner with Harry Potter props like scarves, hats, and wands, where guests can take photos with their cookies. Use a backdrop of the Hogwarts castle or the Forbidden Forest for added effect.
13. Advanced Techniques for Experienced Decorators
For seasoned decorators ready to elevate their “Harry Potter decorated cookies,” exploring advanced techniques can add an extraordinary level of detail and realism to your creations. These techniques allow for more sophisticated designs, incorporating elements of 3D art and utilizing special materials like edible gold dust to enhance the magical qualities of your cookies. Here’s how you can implement these advanced decorating methods to impress any Harry Potter fan.
Incorporating 3D Elements
Adding three-dimensional effects to your cookies can transform them from flat treats into miniature sculptures that pop with detail and texture.
- Varying Icing Consistencies: To create 3D effects, use royal icing in various consistencies. Thicker, stiffer icing is perfect for creating raised elements that stand up on the cookie. Softer icing can be used for elements that need to spread slightly but still hold a raised shape.
- Techniques for 3D Effects:
- Piping Techniques: Use different piping tips to achieve various textures. For example, a petal tip can create leaves or feather-like textures, while a star tip can produce a more rigid, textured appearance suitable for Hogwarts crests.
- Layering: Apply icing in layers, allowing each layer to dry before adding the next. This technique builds up height and depth, essential for 3D effects.
- Structural Elements: For very high pieces, consider adding a small piece of edible material as a base to support the icing, such as a marshmallow or a thickened fondant base.
- Applications:
- Hogwarts Crests: Create a raised crest by outlining the shape with thicker icing and filling it in with layers of slightly softer icing.
- Magical Creatures: For creatures like Hedwig or a Hippogriff, use icing to sculpt feathers and other features in layers, adding realism and texture.
Advanced Painting Techniques
To add a touch of luxury and magic to your “Harry Potter decorated cookies,” advanced painting techniques using special materials like edible gold dust can be particularly effective.
- Using Edible Gold Dust:
- Preparation: Mix a small amount of gold dust with alcohol (like vodka) or an extract to create a paintable solution. The alcohol helps the gold dust adhere to the icing and dries quickly without dampening the cookie.
- Application: Use a fine brush to apply the gold dust solution to areas you want to highlight. This could be the rims of potion vials, details on the Golden Snitch, or even parts of the Hogwarts castle.
- Techniques for Enhanced Effects:
- Highlighting Details: Use the gold dust selectively to highlight details that would naturally catch the light, such as the edges of a cauldron or the engravings on a wand.
- Adding Sparkle: For a magical effect, add a light dusting of gold to areas like spell effects or magical fire to make them shimmer and stand out.
Final Considerations
When employing these advanced techniques in your “Harry Potter decorated cookies,” it’s important to plan your designs carefully:
- Sketch Designs First: Before you start decorating, sketch out your designs, noting where you will apply 3D effects and gold highlights.
- Practice Makes Perfect: Experiment on a few practice cookies to refine your techniques, especially if you’re working with new materials like gold dust.
- Time Management: Advanced techniques can be time-consuming. Allow plenty of time for each decorating step, particularly drying times between layers.
14. Conclusion
Decorating Harry Potter-themed cookies is not only a creative expression but also a delightful way to immerse yourself and others in the magical world of witches and wizards. With the right techniques and tools, you can create stunning edible art that captures the essence of the series. Whether you are a novice baker or a seasoned decorator, the joy of crafting these cookies will bring a little magic into your kitchen.
15. FAQs
- What is the best type of icing to use for the watercolor technique on cookies?
Royal icing is ideal due to its smooth texture and ability to harden, providing a perfect canvas. - How do I prevent my cookies from spreading and losing their shape while baking?
Chill the dough thoroughly before cutting and baking, and avoid using too much leavening agent in your recipe. - Can I use regular food coloring for the watercolor technique?
Gel food coloring is recommended because it’s more concentrated and blends more smoothly with alcohol for painting. - How long do decorated cookies last?
When stored in an airtight container at room temperature, decorated cookies can last up to 2 weeks. - Are there any shortcuts for beginners to achieve professional-looking cookies?
Using a cookie projector can greatly simplify the process of transferring intricate designs, making it accessible for beginners.
Resources
- https://www.shethespy.com/blog/a-guide-to-slytherin
- https://www.shethespy.com/blog/a-guide-to-ravenclaw
- https://harrypotter.fandom.com/wiki/Quidditch_uniform


