How to Airbrushing a Cookie: Easy Techniques for Breathtaking Designs

1. Introduction
Ever wondered how those stunning, magazine-worthy cookies are made? Well, a big secret behind those eye-catching designs is airbrushing—a technique that might seem intimidating at first but is incredibly rewarding once you get the hang of it. As someone who has spent countless hours perfecting this craft, I’m here to guide you through how to airbrushing a cookie, ensuring you can create your own little edible masterpieces right at home.
2. What You Need for How to Airbrushing a Cookie
Diving into the world of cookie artistry through airbrushing is an exciting journey. The right tools and materials are your first step toward creating edible masterpieces that could grace the pages of any gourmet magazine. Here’s a breakdown of everything you’ll need to start this sweet adventure.
Equipment Required
To embark on your journey of learning how to airbrush a cookie, you’ll need to gather some essential equipment:
- Airbrush Kit: The cornerstone of your airbrushing setup is the airbrush kit, which typically comprises the airbrush itself, a compressor to provide the air, and a hose to connect the two. The kit may also include basic maintenance tools and, occasionally, a few starter colors.
- Colors: The palette of edible airbrush colors is vast, allowing for endless creativity. Opt for food-safe, edible airbrush colors explicitly formulated for use on food. These come in various forms, including liquid and powder, though liquid is most commonly used for airbrushing. Ensure the colors are suitable for the type of icing you’ve used on your cookies for best results.
Best Types of Airbrushes for Cookies
Your choice of airbrush will significantly impact your control and the final look of your cookies. Here’s a guide to choosing the right one:
- Dual-action Airbrushes: Favored for their precision, dual-action airbrushes allow you to control the air and color flow separately. This means you can change the intensity of the color or the size of the spray pattern mid-application without stopping. It’s ideal for detailed work and advanced techniques.
- Single-action Airbrushes: These are excellent for beginners. A single-action airbrush controls the air flow automatically, so you only need to worry about the color flow. This can be easier to manage when you’re just starting, though it offers less precision.
Selection of Colors
The colors you choose play a crucial role in the final appearance of your airbrushed cookies. Here are some tips for selecting the right ones:
- Quality Matters: Invest in high-quality, food-grade airbrush colors to ensure the safety and aesthetic appeal of your cookies. Quality colors provide better coverage and more vibrant hues.
- Start with Basics: Begin with a basic color set that includes primary colors (red, yellow, and blue), black, and white. With these, you can mix almost any shade.
- Consider the Finish: Airbrush colors come in various finishes, including matte, metallic, and pearl. Each can add a different dimension to your designs.
- Test Before Use: Always test the color on a similar surface before applying it to your cookies. This helps you adjust the consistency and color as needed.
3. Preparation Steps for How to Airbrushing a Cookie
The journey to creating airbrushed cookies that look as if they belong in the showcase of a high-end bakery begins with proper preparation. Before you start mixing colors or powering up your airbrush, setting up your workspace and preparing your cookies are crucial steps that cannot be overlooked. These preparation steps are foundational to mastering how to airbrushing a cookie and ensuring the end result is as beautiful as it is delicious.
Preparing Your Workspace
A well-organized and prepared workspace not only makes the airbrushing process smoother but also ensures quick clean-up and maintenance of your equipment. Follow these tips to set up an ideal space:
- Choose the Right Spot: Select a well-ventilated area to work in, as airbrushing can produce a fine mist that shouldn’t be inhaled over long periods. If possible, work near an open window or use an exhaust fan.
- Protect Surfaces: Cover your working surface with newspapers, butcher paper, or a plastic sheet. Airbrush color can sometimes spray beyond your intended target, and protecting surfaces makes cleanup much easier.
- Organize Your Tools: Have all your tools and materials—airbrush kit, colors, cookies, and stencils—within easy reach. A well-organized workspace allows for a smoother workflow and reduces the chances of accidents or spills.
- Lighting is Key: Good lighting is essential. Ensure your workspace is well-lit so you can see the fine details of your work. This helps in achieving precision in your designs.
Preparing the Cookies for Airbrushing
The canvas for your art, the cookies themselves, need to be ready to accept the airbrush color. Here’s how to prepare them:
- Cool Completely: Before you start airbrushing, ensure your cookies have cooled completely after baking. Decorating warm cookies can lead to melting or smudging of the colors.
- Smooth Surface: Inspect each cookie for bumps or cracks. A smooth surface is crucial for a flawless finish. If you’re using icing, apply a thin, even layer and let it harden. This will create a smooth canvas for airbrushing.
- Use a Base Layer: Applying a thin layer of icing not only smooths out the surface but also helps the airbrush color adhere better and stand out. Choose a white or light-colored base for vibrant colors to pop.
- Testing the Surface: Before you start airbrushing the actual cookies, it’s a good idea to test your airbrush on a cookie with similar icing. This will give you an idea of how the colors will look and behave on your prepared surface.
4. Basics of Airbrushing
Mastering the basics of airbrushing is crucial for anyone looking to explore the creative possibilities of decorating cookies. Although the process may initially seem complex, with a bit of practice and understanding of the fundamental techniques, you’ll soon be on your way to creating stunning, edible artworks. Let’s delve deeper into setting up your airbrush, understanding its controls, and properly testing it to achieve the best results when learning how to airbrushing a cookie.
How to Setup Your Airbrush
Proper setup of your airbrush is the first step to ensure smooth operation and the desired outcome on your cookies. Here’s a detailed breakdown:
- Connecting the Airbrush to the Compressor: Your airbrush kit will include a hose that connects the airbrush to the compressor. Ensure this connection is tight and secure to prevent any air leaks, which can affect the consistency of your airbrushing.
- Filling the Airbrush Cup with Color: Airbrush colors are highly pigmented, so a few drops will go a long way. Pour your chosen color into the airbrush cup, but be mindful not to overfill. This allows for better control and minimizes the risk of spillage.
- Adjusting the Compressor Settings: The compressor controls the air pressure, which is critical for achieving different effects. For fine, detailed work on cookies, a lower pressure setting is ideal. If you need to cover larger areas, increase the pressure. Familiarize yourself with your compressor’s settings to find what works best for the effects you want to achieve.
Understanding the Basic Controls
Getting to know the controls of your airbrush will significantly improve your precision and skill in applying designs:
- The Trigger: This dual-function control manages both the air and paint flow. Pressing down initiates the air flow, and pulling back releases the paint. The further you pull back, the more color will spray out. Mastering trigger control is key to managing the intensity and spread of your designs.
- Needle Adjustment: Located at the back of the airbrush, this control allows you to adjust the spray pattern. You can achieve a very fine line for intricate details or a broader spray for filling in larger areas. Adjusting the needle gives you flexibility in your designs, enabling you to switch between effects without changing tools.
Testing the Airbrush
Before you start decorating your cookies, it’s crucial to test your airbrush:
- Spray on a Test Surface: Use a piece of paper, parchment, or a similar surface to test. This practice run will help you gauge the flow of color, the effect of your current pressure settings, and how the airbrush responds to your control.
- Adjust as Needed: This is the perfect time to make any adjustments to the airbrush settings or your technique. Ensure the color output is smooth and consistent with what you envision for your cookies.
5. Techniques for Beginners in How to Airbrushing a Cookie
Embarking on the journey of how to airbrushing a cookie can transform a simple baking project into an artistic endeavor. As a beginner, mastering basic techniques can greatly boost your confidence and skill level. Here’s a detailed guide to starting with simple designs, handling the airbrush properly, and controlling spray patterns effectively.
Simple Designs to Start With
Starting simple helps you get comfortable with the airbrush’s functionality and nuances without feeling overwhelmed. Here are a couple of beginner-friendly techniques:
- Single Color Fades: This technique involves applying a smooth gradient effect across the cookie. To achieve this:
- Start spraying from one side of the cookie with the airbrush close to the surface to get a strong color.
- Gradually pull the airbrush away and move across the cookie to reduce the intensity of the color, creating a fading effect.
- Practice maintaining a steady hand speed and airbrush distance to ensure the gradient is smooth.
- Dots and Lines: These are fundamental practices that enhance your precision and control.
- Dots: Aim the airbrush directly at the point where you want the dot, and gently tap the trigger. The longer you hold, the larger the dot.
- Lines: Start with the airbrush at the beginning of where you want the line, gently pull back on the trigger, and move the airbrush along the desired path. Keep your movement steady for an even line.
How to Handle the Airbrush
Proper handling of the airbrush is critical for achieving the best results and preventing fatigue during longer sessions. Here are tips on how to hold and maneuver your airbrush:
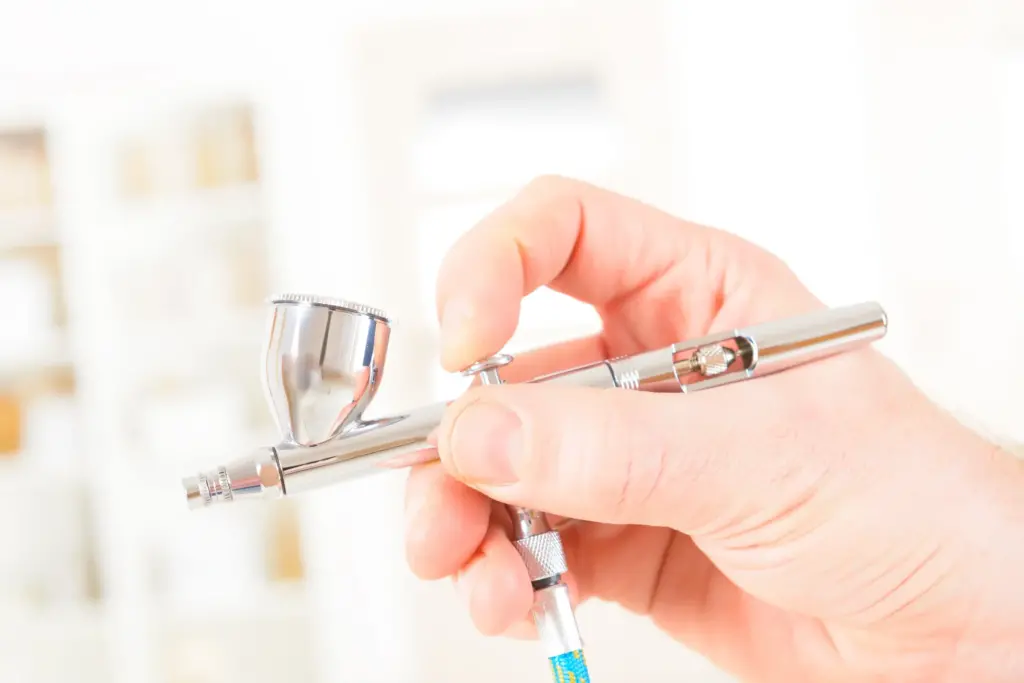
- Grip: Hold the airbrush as you would a pen. This grip allows for more precise control and delicate movements. Ensure your hand is relaxed to avoid cramping.
- Distance: The ideal distance between the airbrush and the cookie should be about 6 inches. This distance helps ensure that the spray is evenly distributed over the area you’re working on. Adjust closer for finer details and further away for broader coverage.
Controlling Spray Patterns
Controlling where and how the paint applies is what allows you to turn a plain cookie into a piece of art. You can use various tools and techniques to shape your designs:
- Using Stencils:
- Stencils are perfect for creating precise shapes and detailed patterns without freehand drawing.
- Secure the stencil over the cookie to prevent it from moving. Use small amounts of adhesive if necessary.
- Spray lightly over the stencil to avoid bleeding under the edges, which can smudge the design.
- Freehand Techniques:
- Freehand airbrushing allows for complete creative freedom. This technique is more challenging but very rewarding.
- Practice steady hand movements to maintain control over the spray. Begin with simple shapes and progress to more complex designs as you gain confidence.
6. Advanced Techniques for Airbrushing Cookies
Airbrushing cookies involves more than just adding a splash of color; it’s about mastering advanced techniques to elevate your creations to professional levels. For those looking to enhance their skills, understanding how to airbrushing a cookie with techniques like creating gradients, effectively using stencils, and layering colors can significantly enrich your designs. These methods add complexity and depth, turning each cookie into a miniature work of art.
Creating Gradients
Gradients are essential for adding life-like depth and beauty to your cookies. They can mimic natural shadows and highlights, or add a soft transition of color that makes your designs pop. Here’s how to perfect this technique:
- Start with Light Colors: Always begin with the lightest color in your gradient. This base color should cover the area where you want the gradient to start.
- Gradual Transition: Slowly introduce the darker color by spraying from the end point of the lighter color, overlapping the areas slightly. The key is to maintain a consistent, gentle pressure on the trigger to avoid harsh lines.
- Blend Seamlessly: As you move into the darker shades, adjust the distance of the airbrush from the cookie to blend the colors smoothly. Closer application results in darker, more concentrated color, while pulling back softens the effect.
- Practice Makes Perfect: Achieving a flawless gradient requires practice. Try on a paper or a spare cookie to gauge the transition before applying it to your final piece.
Using Stencils
Stencils can dramatically enhance the detail and precision of your cookie designs, making intricate patterns achievable. Here’s how to use stencils like a pro:
- Securing the Stencil: Use minimal adhesive to hold the stencil in place. This can be a repositionable adhesive spray or small pieces of tape. Ensure the stencil lies flat against the cookie to prevent underspray.
- Spraying Technique: Hold the airbrush perpendicular to the cookie’s surface to ensure the spray is evenly distributed. Spray with light, even strokes to avoid build-up, which can bleed under the stencil.
- Clean Removal: Carefully remove the stencil after application to avoid smudging the design. Allow the paint to set for a few minutes if the design is particularly intricate or if the layering is thick.
Layering Colors
Layering is a fantastic way to add dimension and texture to your cookie designs. Here’s how to effectively layer colors without muddying your artwork:
- Allow Drying Time: After applying each layer, allow it to dry slightly. This prevents the subsequent layers from blending into one another, which can distort your design.
- Plan Your Design: Know which colors and parts of the design will be layered beforehand. Start with lighter colors and build up to the darker ones for the best visual effect.
- Control Saturation: Adjust the amount of color by controlling the airbrush’s distance from the cookie. Closer distances result in more saturated colors, ideal for creating shadows or accents.
7. Common Mistakes and How to Avoid Them

Airbrushing cookies is an art that requires precision and patience. However, beginners and even seasoned decorators can make common mistakes that can affect the quality of their designs. Understanding these pitfalls and knowing how to avoid them can significantly enhance your technique in how to airbrushing a cookie and result in beautifully decorated cookies. Here’s a detailed look at some of the frequent errors made during the process and tips on how to prevent them.
Over-spraying
One of the most common issues in airbrushing cookies is over-spraying, where too much color is applied too quickly, causing the colors to run and mix unexpectedly.
- Start with Light Layers: Always begin with a very light layer of color. It’s easier to add more color than to correct an overly saturated design.
- Gradual Build-up: Increase the intensity of the color gradually. Allow each layer to dry slightly before applying the next. This method gives you more control and helps prevent the colors from bleeding into each other.
- Distance Control: Keep the airbrush at a consistent distance from the cookie. Moving too close can deposit too much paint, leading to runs.
Uneven Color Distribution
Achieving an even coat of color across a cookie can be challenging, especially for those new to airbrushing.
- Consistent Hand Movements: Practice smooth, steady hand movements. Avoid jerky motions which can lead to uneven application.
- Maintain Speed and Distance: Keep your moving speed and the distance from the cookie consistent. Any variation can cause blotchy or uneven color distribution.
- Regular Testing: Periodically test the spray on a piece of paper to ensure the airbrush is applying color evenly. This test can help adjust your technique before applying paint to the cookie.
Airbrush Maintenance Tips
Proper care and maintenance of your airbrush are critical to ensuring it continues to perform well. A poorly maintained airbrush can lead to a host of problems, including uneven spray patterns and clogs.
- Clean Regularly: Clean your airbrush thoroughly after each use. Remove any residual paint from the cup, and flush the system with cleaner or warm soapy water.
- Disassemble for Deep Cleaning: Periodically, disassemble your airbrush to clean all the internal components. Be sure to consult the manufacturer’s guide to reassemble it correctly.
- Use Proper Tools: Use brushes and cleaners specifically designed for airbrushes to avoid damaging delicate parts like the needle and nozzle.
8. Decorating Ideas
When it comes to decorating cookies, learning how to airbrushing a cookie opens up a world of creative possibilities. Whether you’re crafting cookies for a holiday, a birthday, a wedding, or just for fun, the flexibility of airbrushing allows you to tailor designs to fit any theme. Here are some advanced decorating ideas that can help you elevate your cookie decorating skills and impress anyone who sees (and tastes) your creations.
Theme-Based Decoration Tips
Tailoring your cookie designs to specific events adds a personalized touch that can make any occasion feel even more special. Here are some suggestions for theme-based decorations using an airbrush:
- Holidays:
- Independence Day: Create vibrant red, white, and blue patterns, or use star-shaped stencils to spray patriotic designs.
- Halloween: Utilize stencils of pumpkins, ghosts, and other spooky elements. Experiment with dark, moody colors for a haunting effect.
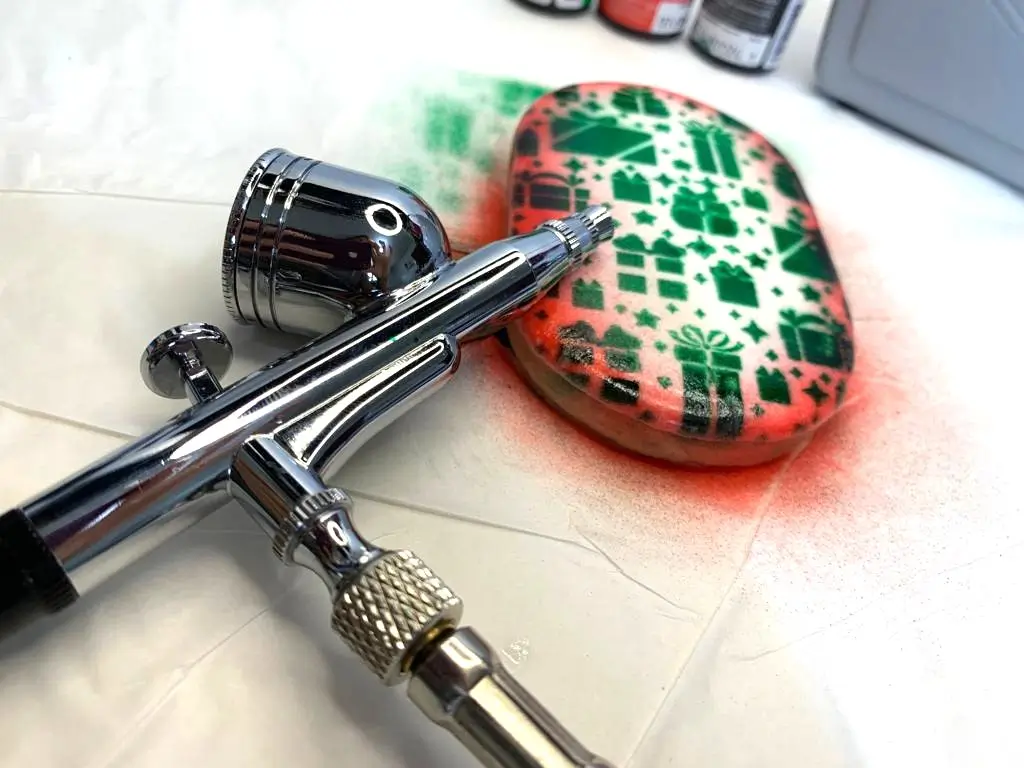
- Christmas: Airbrush trees, snowflakes, and ornaments using green, red, and gold. Stencils can help achieve precise shapes and detailed designs.
- Birthdays:
- Personalize cookies with the celebrant’s name or initials. Use their favorite colors or themes, such as sports or flowers, to make the cookies uniquely theirs.
- Consider airbrushing age numbers or milestone markers to commemorate special birthdays.
- Weddings:
- Utilize soft pastel gradients to create an elegant and sophisticated look. Consider airbrushing lace patterns or monograms using stencils.
- Wedding cookies can also reflect the wedding theme or color scheme, adding a coordinated touch to the dessert table.
Mixing Colors Creatively
Mixing colors can greatly enhance the depth and appeal of your cookie designs. Here are tips on how to mix colors effectively when airbrushing cookies:
- Primary Colors: Start with primary colors (red, yellow, blue). These basics can be mixed to create a wide range of secondary and tertiary colors. Having a good understanding of color theory can help you achieve the exact shades you desire.
- Creating Custom Hues: Mix colors directly in the airbrush cup to create custom shades. This technique allows for on-the-fly adjustments and unique color combinations.
- Layering Colors: For more complex color schemes, layer different colors on the cookie. This can create new shades and visual effects, such as shadows and highlights, adding realism or artistic flair to your designs.
- Test First: Always test your mixed colors on a sheet of paper or a spare cookie to ensure the result matches your expectations. This step is crucial to avoid wasting time and ingredients on colors that don’t meet your needs.
9. Finishing Touches Using Airbrush on Cookies

The final steps in learning how to airbrushing a cookie can transform your airbrushed cookies from beautiful to extraordinary. These finishing touches are crucial in setting the design and adding those extra details that catch the eye and delight the senses. Here’s how to expertly apply these final enhancements to ensure your cookies look polished and professional.
Drying and Setting the Design
Ensuring your airbrushed cookies dry and set properly is essential for preserving the vividness and precision of your designs.
- Time and Patience: Airbrushed cookies need to dry completely before they can be stacked, packaged, or further embellished. The drying time varies depending on several factors:
- Amount of Color Used: Heavier applications of paint will naturally take longer to dry.
- Ambient Humidity: High humidity can prolong the drying process. If you’re in a humid environment, consider using a dehumidifier or air conditioning to help speed up drying.
- Air Circulation: Good air circulation can facilitate faster drying. Avoid overcrowding the drying area; spread out the cookies to allow air to circulate around them.
- Checking Dryness: To check if the cookie is dry, lightly touch the edge of the airbrushed area. It should feel dry to the touch and not tacky. If necessary, allow more drying time to ensure the design is fully set.
Adding Final Details with Other Tools
Once your cookies have dried, it’s time to add those final details that elevate your design.
- Food Pens: These are perfect for adding fine lines, writing messages, or drawing intricate details that might be too complex for airbrushing. Choose pens that complement your airbrushed colors for a cohesive look.
- Edible Glitter and Sugar Pearls: Add sparkle or a touch of elegance with edible glitter or sugar pearls. These embellishments are ideal for special occasions like weddings, anniversaries, or festive holidays.
- Texture and Depth: Besides visual enhancements, consider adding textural elements:
- Royal Icing Accents: Pipe small details with royal icing for added texture and depth.
- Fondant Pieces: Small fondant shapes or figures can also be added to create themed designs, such as flowers or characters.
- Sealing the Design: For cookies that might need to travel or be handled more, consider using a food-safe sealant spray. This can help protect the airbrushed designs from smudging or fading.
10. Cleanup Your Airbrush
The cleanup process is a critical aspect of maintaining the functionality and longevity of your airbrush equipment. Proper cleaning and storage are vital to ensure that your tools are prepared for the next decorating session and to prevent any long-term damage that could affect their performance. Here’s a comprehensive guide on how to properly clean and store your airbrush and other decorating tools.
Proper Cleaning of Airbrush Equipment
Regular and thorough cleaning of your airbrush is vital to prevent clogs, ensure smooth operation, and maintain the quality of your artwork. Follow these steps to clean your airbrush effectively:
- Disassemble the Airbrush: Start by carefully taking apart the airbrush to access all components that come into contact with paint. This typically includes the nozzle, needle, and air cap. Refer to your airbrush’s manual for detailed instructions on how to disassemble it safely.
- Cleaning Solvents: Use a cleaning solvent that is specifically designed for airbrushes. You can also use warm soapy water for a more gentle cleaning. Avoid harsh chemicals that can damage the airbrush parts.
- For the Needle and Nozzle: Dip these parts in the solvent and gently wipe them with a soft, lint-free cloth or paper towel. Be especially careful with the needle to avoid bending it.
- For the Body and Cup: Flush the main body and paint cup with the solvent to remove any residual paint. You can use an old paintbrush or a special airbrush cleaning brush to scrub away any stubborn paint residue.
- Rinse Thoroughly: After cleaning, rinse all parts with clean water to remove any traces of solvent or soap.
- Dry Completely: Allow all components to dry thoroughly. Any moisture left on the airbrush parts can lead to rust or other damage. Use a soft, dry cloth to help remove excess water, then let the parts air dry.
- Reassemble the Airbrush: Once all parts are dry, reassemble your airbrush according to the manufacturer’s instructions. Ensure that every component is correctly aligned and securely fitted to avoid any issues during your next use.
Storing Your Supplies
Proper storage of your airbrush and other decorating tools is just as important as cleaning:
- Dry Environment: Store your airbrush and tools in a dry, dust-free environment. Moisture can cause rust and degradation of metal parts, while dust can clog your airbrush when it’s next used.
- Organized Storage: Keep your airbrush and all its components neatly organized in a case or a dedicated drawer. This prevents any accidental damage and makes it easier to find everything you need for your next project.
- Protective Covers: Use covers or caps for the needle and nozzle to protect these delicate parts from any environmental damage or accidental bumps.
- Separate Paints and Solvents: Store your airbrush paints and solvents separately from the airbrush kit to avoid any accidental spills during storage.
11. Troubleshooting When Learning How to Airbrushing a Cookie
Mastering how to airbrushing a cookie involves addressing common issues that may surface during the process. Understanding how to swiftly troubleshoot these problems can save time and resources while enhancing the quality of your final product. Here, we explore typical challenges faced by airbrush users and offer practical solutions to help you achieve superior results.
Fixing Common Issues
Even with careful preparation and technique, you might encounter issues like spattering or uneven spray. Here’s how to address them effectively:
- Spattering:
- Cause: Spattering often happens if the airbrush is clogged, or if the paint is too thick.
- Solution: First, clean the nozzle thoroughly to remove any clogs. Use a specialized airbrush cleaner for best results. If the issue persists, thin the paint slightly with an appropriate thinner. This adjustment should help create a smoother, more consistent spray.
- Uneven Spray:
- Cause: An uneven spray can be caused by air leaks or incorrect air pressure settings.
- Solution: Inspect the airbrush and hose connections for any leaks and ensure they are tightly sealed. Adjust the air pressure settings on the compressor; sometimes a slight increase or decrease in pressure can improve the evenness of the spray. Always test these adjustments on a piece of paper or a spare cookie before applying them to your actual project.
Adjusting for Better Results
Achieving perfection with an airbrush is a process of continuous learning and adjustment. Here are some strategies to enhance your airbrushing technique:
- Practice Consistency:
- Regular practice is crucial in mastering any skill, and airbrushing is no exception. Spend time working on your spray patterns and pressure control. The more you practice, the more intuitively you will be able to correct flaws in your technique.
- Experiment with Settings:
- Every airbrush model is different, and the optimal settings for one project might not work for another. Don’t hesitate to tweak the air pressure, paint flow, and even the distance from which you spray. Experimenting with these variables can help you discover the perfect settings for different effects and designs.
12. Conclusion
Learning how to airbrushing a cookie is an art form that marries creativity with culinary prowess. Whether you’re just starting out or seeking to hone your skills, the key lies in practicing, experimenting, and enjoying the process. Remember, each cookie offers a blank canvas ready to be transformed into a remarkable creation.
13. FAQs
- What is the best airbrush for cookie decorating?
Dual-action airbrushes offer the best control for detailed work on cookies. - How long does it take for airbrushed cookies to dry?
Drying time can vary but generally ranges from 30 minutes to a few hours, depending on the amount of color used and the environmental conditions. - Can airbrush colors be mixed to create custom shades?
Yes, primary airbrush colors can be mixed to create a wide range of shades. Always mix colors in a separate container or airbrush cup to test the outcome first. - Are there any health concerns with airbrushing cookies?
It’s crucial to use food-safe, edible colors designed specifically for airbrushing to ensure safety. - What’s the best way to clean an airbrush after use?
Disassemble the airbrush, clean all parts with a suitable cleaner or warm soapy water, and make sure everything is dry before reassembly.
This completes our comprehensive guide on how to airbrush cookies. With practice and creativity, you’ll be creating stunning, delicious treats that are sure to impress!
Resources
https://youtu.be/EFKhGWYVwEI?si=w9QNNEpKZ2zXt0gF


